Star Wars Zero Company Unreal Engine 5 Stuttering Fix: PC Performance & FPS Guide
Star Wars Zero Company has a lot going for it. The turn-based combat feels deliberate without becoming sluggish, the Clone Wars setting gives every mission a strong sense of place, and the squad mechanics make you care about what happens between firefights. But after spending time with plenty of Unreal Engine 5 games, I wasn’t particularly surprised when the PC version showed some familiar performance problems.
The biggest annoyance isn’t always low FPS. It’s stuttering.
You can be sitting at a perfectly respectable 70 or 90 FPS, then rotate the camera, enter a new area, trigger an effect, or pull the view back over a larger battlefield and suddenly the game hitching becomes obvious. The average FPS number looks fine, but the frame pacing feels terrible.
I’ve run into this exact type of problem in other UE5 releases. Sometimes it is shader compilation. Sometimes it is asset streaming. Sometimes VRAM simply gets pushed too hard. And occasionally, a configuration that looks harmless on paper makes everything worse.
So rather than chasing a magical “one setting fixes everything” solution, I would approach Star Wars Zero Company PC performance the same way I approach most demanding PC games: fix the obvious cache problems first, give the engine enough memory headroom, then tune the settings around the hardware you actually have.
What Causes the Stuttering in Star Wars Zero Company?
There isn’t necessarily one single culprit behind every hitch.
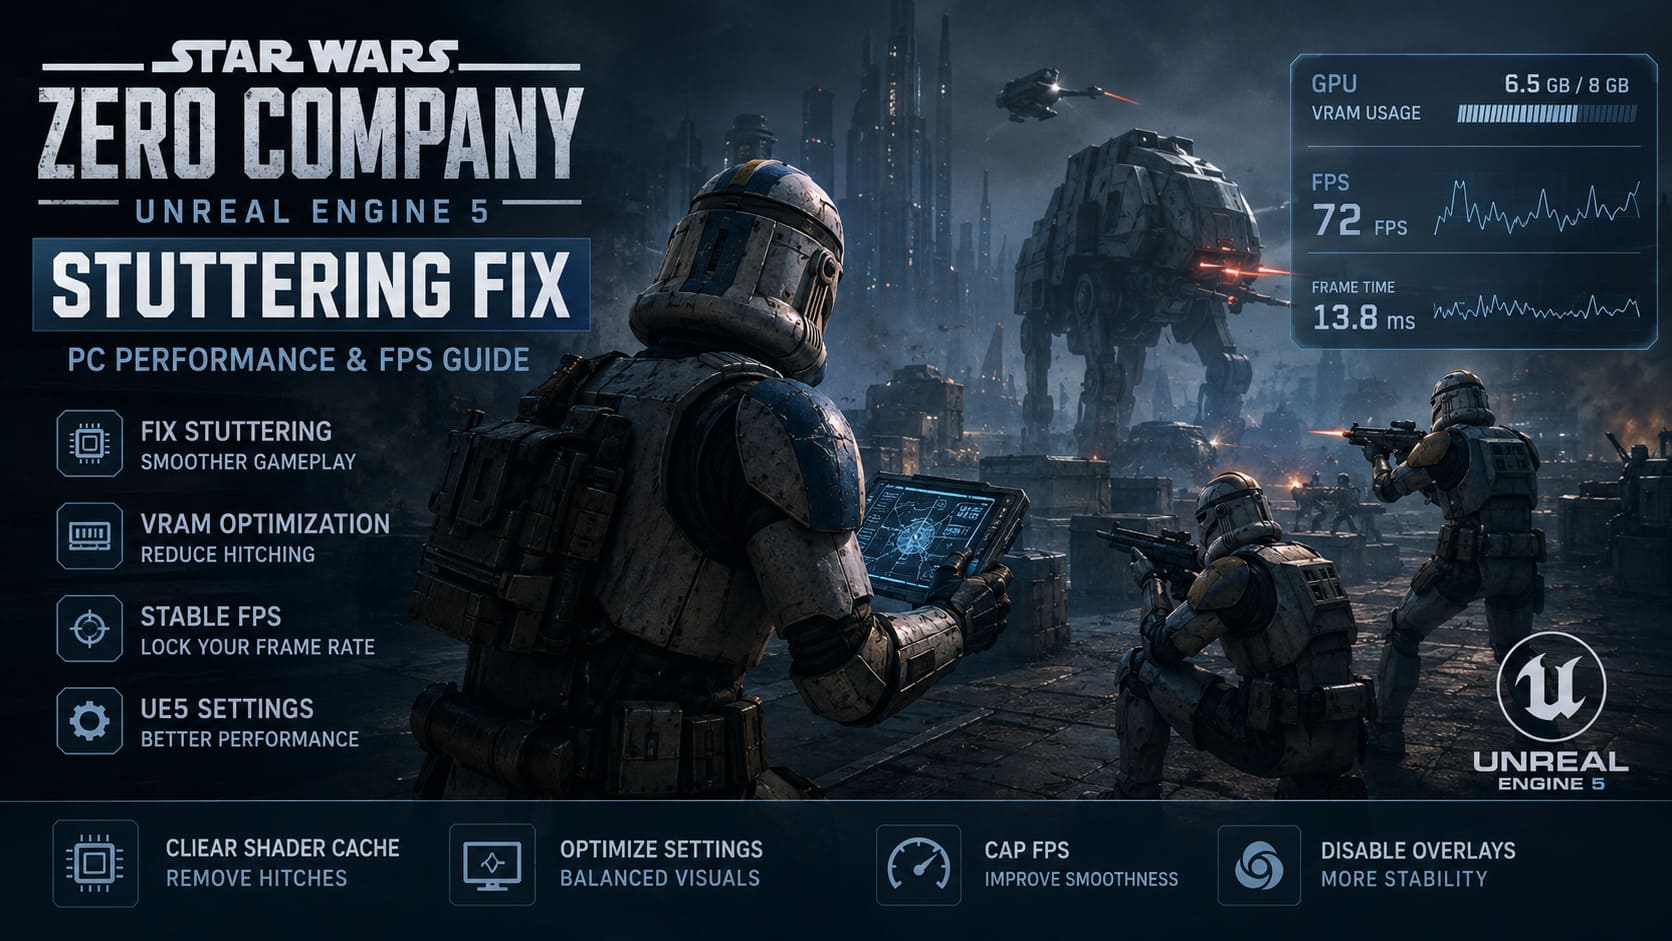
Unreal Engine 5 is capable of producing excellent visuals, but its modern rendering systems can put considerable pressure on both the GPU and CPU. Features such as Nanite-style geometry handling, virtualized textures, dynamic effects, and aggressive asset streaming can all contribute to inconsistent frame delivery.
The important distinction is this:
Low FPS and stuttering are not the same problem.
If your system consistently produces 35 FPS, lowering graphics settings can help. If it produces 90 FPS but repeatedly freezes for a fraction of a second, lowering everything to Low may not solve the actual issue.
In my experience, the most useful areas to investigate are:
- Shader cache behavior
- VRAM usage and texture streaming
- Frame generation and synchronization
- Unreal Engine configuration
- Background overlays
- An unnecessarily high graphics preset
Here is the order I’d tackle them.
| Problem | What You May Notice | First Thing I’d Try |
|---|---|---|
| Shader compilation | Hitches during new effects or areas | Clear shader cache |
| VRAM pressure | Stutters during camera movement | Lower textures and streaming load |
| Poor frame pacing | FPS looks high but feels uneven | Cap FPS and adjust sync |
| Background hooks | Random desktop-like hitching | Disable overlays |
| Heavy UE5 streaming | Traversal stutters | Tune Engine.ini carefully |
1. Start With a Clean DirectX Shader Cache
This is the least complicated fix, so I’d always try it before editing configuration files.
Unreal Engine games can compile shaders as you encounter new materials, effects, lighting situations, and other visual elements. Ideally, those shaders are cached and reused later. If the cache becomes outdated or corrupted, however, you can end up with repeated hitching.
I’ve seen this happen enough times across PC games that I consider clearing the shader cache a basic troubleshooting step rather than some exotic tweak.
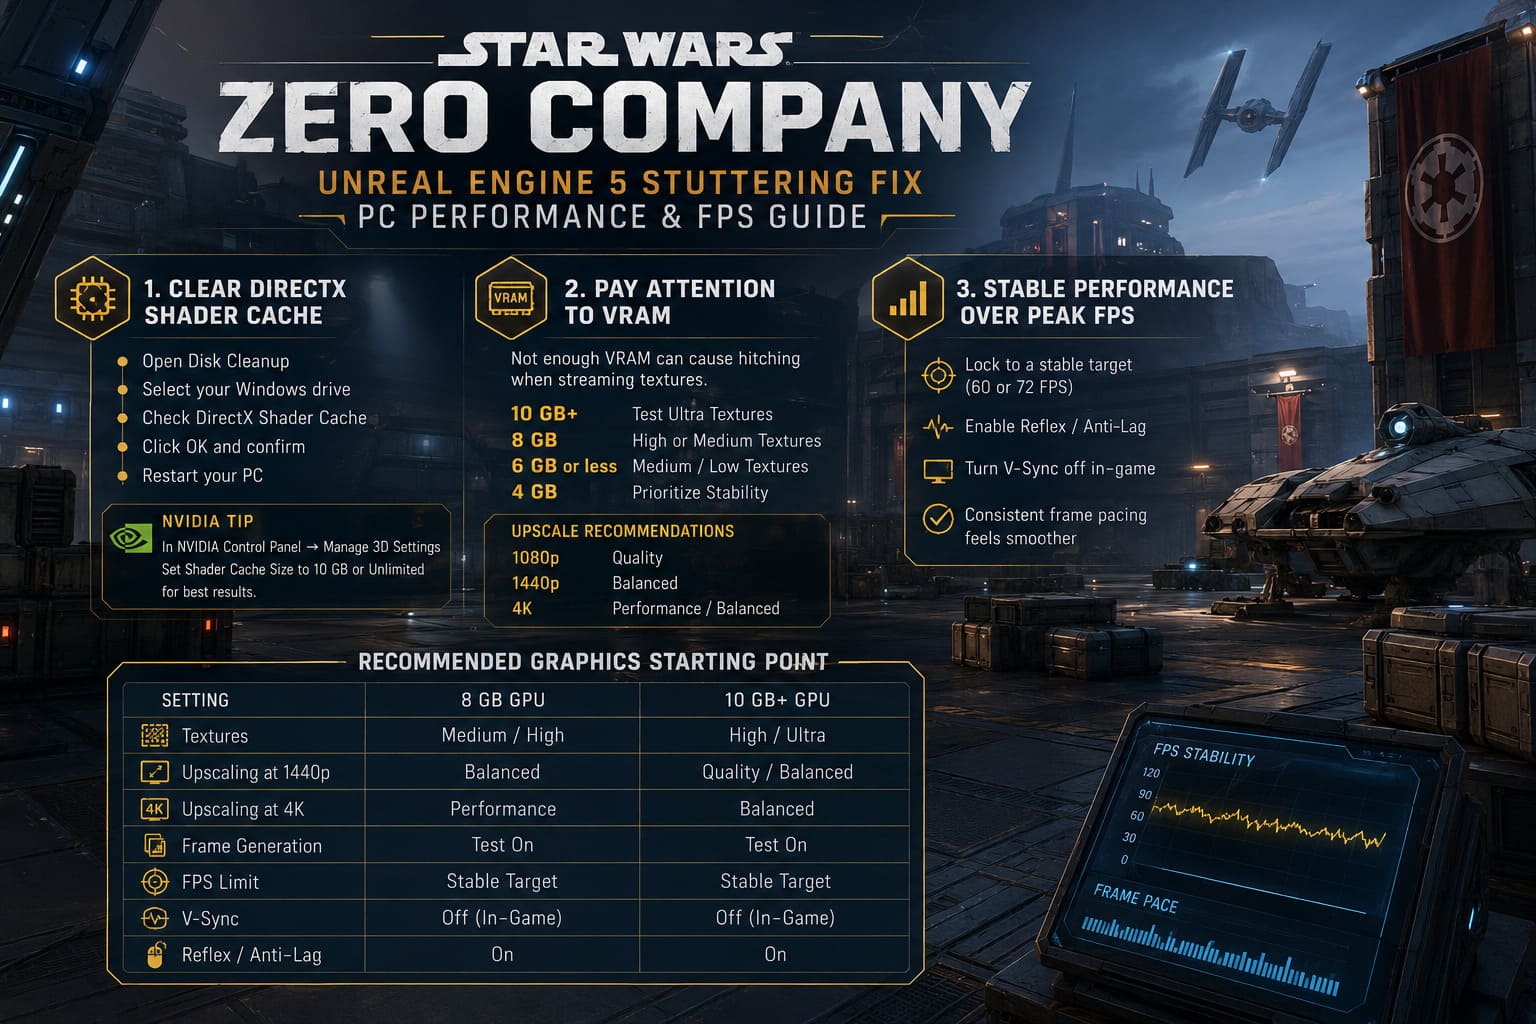
How to Clear the DirectX Shader Cache
- Press Windows + S and search for Disk Cleanup.
- Open the utility and select your Windows drive.
- Look through the available cleanup options.
- Select DirectX Shader Cache.
- Click OK and confirm the deletion.
- Restart your PC before launching the game again.
The first launch after clearing the cache may not immediately feel perfect. That’s normal. The game and driver need to rebuild cached data.
If you’re using an NVIDIA GPU, I would also check the shader cache allocation in the NVIDIA Control Panel. Go to Manage 3D Settings and look for Shader Cache Size.
A larger cache can be useful for a demanding UE5 game, especially if you regularly play for long sessions. 10 GB or Unlimited is a reasonable starting point if your storage situation allows it.
2. Don’t Ignore VRAM
This is probably the setting category I’d pay the most attention to.
Modern games increasingly punish GPUs that are technically powerful enough to render the scene but don’t have enough VRAM available for the chosen texture and streaming workload.
That can produce a strange situation where the game runs beautifully one moment and starts hitching badly when you move through a complex area.
For Star Wars Zero Company, I’d avoid blindly setting everything to Ultra.
If your GPU has 8 GB of VRAM, for example, I would rather run High or Medium textures with stable frame pacing than Ultra textures followed by constant streaming stutters.
A rough starting point:
- 10 GB+ VRAM: Ultra textures are reasonable to test.
- 8 GB VRAM: High or Medium is safer.
- 6 GB or less: Medium/Low textures are worth considering.
- 4 GB: Prioritize stability over image quality.
Resolution also matters. Running at 4K dramatically increases the workload, particularly when combined with high-quality textures and demanding effects.
For 1440p, I’d start with Balanced upscaling. At 4K, Performance or Balanced can make much more sense depending on your GPU. At 1080p, Quality upscaling is generally preferable if you have enough performance headroom.
3. My Recommended Graphics Starting Point
Rather than simply telling everyone to use Low settings, I’d build the configuration around the type of hardware being used.
| Setting | 8 GB GPU | 10 GB+ GPU |
|---|---|---|
| Textures | Medium/High | High/Ultra |
| Upscaling at 1440p | Balanced | Quality/Balanced |
| Upscaling at 4K | Performance | Balanced |
| Frame Generation | Test On | Test On |
| FPS Limit | Stable target | Stable target |
| V-Sync | Off in-game | Off in-game |
| Reflex / Anti-Lag | On | On |
The key phrase here is stable target.
If your machine jumps between 72 and 105 FPS constantly, locking it to something like 60 or 72 FPS can feel considerably smoother. A stable 60 FPS with consistent frame delivery is often much more enjoyable than an unstable 90 FPS.
That’s especially true in a tactical game. You’re not playing an esports shooter where every millisecond determines whether you win a duel.
4. Be Careful With Frame Generation and V-Sync
Frame generation can make a game look dramatically smoother, but it doesn’t magically remove the underlying rendering workload.
If your base frame rate is unstable, generated frames can sometimes make the presentation feel strange rather than fixing the fundamental problem.
I’d start with:
In-game V-Sync: OFF
Then use your GPU driver’s synchronization options if necessary.
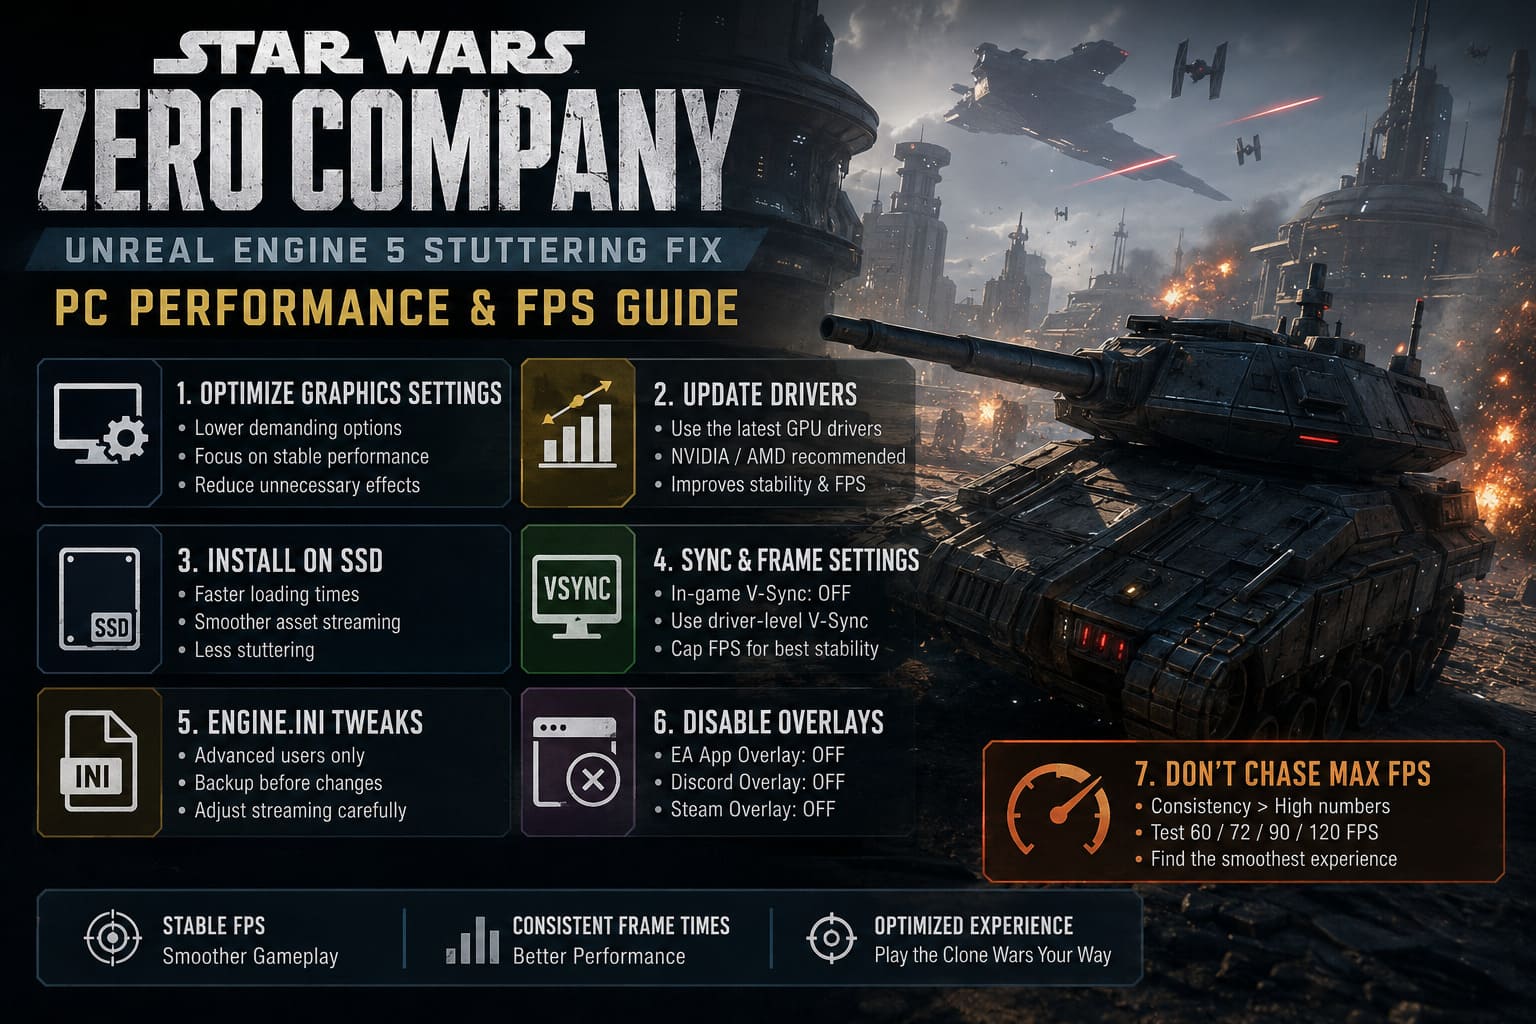
For NVIDIA users, the NVIDIA Control Panel can be used to create a specific profile for the game. AMD users can do something similar through Adrenalin.
If you’re using frame generation, experiment with driver-level V-Sync and an appropriate FPS cap rather than simply turning every synchronization option on simultaneously.
And this is important: don’t assume Fast V-Sync or another driver option is automatically better for every monitor. Your display refresh rate, VRR support, GPU, and frame rate all matter.
If you have G-SYNC or FreeSync, I’d prioritize a clean VRR configuration and a sensible frame cap instead of stacking multiple synchronization technologies.
5. The Engine.ini Tweak Is for Advanced Users
This is where I’d slow down.
There are plenty of Unreal Engine configuration guides online that throw twenty or thirty commands into Engine.ini and promise miracles. I’ve tried enough PC games to be skeptical of that approach.
Some variables are useful. Others are version-dependent. Some can actually make performance worse if they’re mismatched with your hardware.
If you want to experiment with Engine.ini, make a backup first.
The configuration is typically found under:
C:\Users\%username%\AppData\Local\ZeroCompany\Saved\Config\Windows
Look for Engine.ini, open it with Notepad, and back up the original before changing anything.
For systems with sufficient VRAM, streaming-related variables can sometimes help reduce aggressive texture pool behavior. However, I would not blindly copy a fixed 7000 MB pool value onto every GPU.
The correct value depends on your available VRAM, resolution, texture settings, and the game’s own memory management.
If you decide to use custom streaming parameters, test one change at a time. That makes it much easier to identify which tweak actually helped.
I’d also avoid making Engine.ini read-only immediately. Keeping the file editable during troubleshooting is more practical. Once you know a particular configuration is stable, you can decide whether preventing automatic changes is worthwhile.
6. Disable the Overlays You Don’t Need
This is another simple test that costs almost nothing.
Steam, Discord, and the EA App can all introduce overlays or background hooks into a game. Most of the time they work perfectly. Sometimes they don’t.
When I’m troubleshooting stuttering, I prefer removing variables rather than assuming everything is harmless.
Try disabling:
- EA App In-Game Overlay
- Discord Game Overlay
- Steam Overlay
Then restart the game and compare the frame pacing.
Don’t expect a huge FPS increase. That’s not really the point.
The goal is to determine whether the hitching is being caused or aggravated by software running on top of the game.
7. Don’t Chase Maximum FPS
This is probably the biggest lesson I’ve learned from playing PC games for years.
A benchmark screenshot showing 120 FPS doesn’t tell you whether the game feels good.
Frame-time consistency matters.
If Star Wars Zero Company runs at 100 FPS but regularly drops to 45 for tiny fractions of a second, the game can feel worse than a properly capped 60 FPS presentation.
I’d test several caps:
- 60 FPS
- 72 FPS
- 90 FPS
- 120 FPS
Pick the highest number your PC can maintain without constantly bouncing around.
For a 60 Hz monitor, 60 FPS is an obvious starting point. On a 120/144 Hz display, 72, 90, or 120 FPS can make sense depending on your hardware.
And if your GPU is sitting at 99% utilization all the time, don’t expect a frame-generation toggle to solve every hitch. Reduce the actual rendering workload first.
My Practical Star Wars Zero Company PC Setup
If I were setting up the game on a new PC today, I wouldn’t immediately start editing system files.
I’d do this instead:
Step 1: Clear the DirectX Shader Cache.
Step 2: Launch the game and let it rebuild its shaders.
Step 3: Set textures according to available VRAM rather than automatically selecting Ultra.
Step 4: Enable DLSS or FSR if you need additional GPU headroom.
Step 5: Turn in-game V-Sync off and establish a sensible FPS cap.
Step 6: Enable Reflex or Anti-Lag where supported.
Step 7: Disable Steam, Discord, and EA overlays for testing.
Step 8: Only after that, experiment with Engine.ini.
That order matters. There is no reason to start with complicated configuration edits when a corrupted shader cache or excessive VRAM usage may be responsible.
Star Wars Zero Company Respec Guide: How to Change Specialization & The Best Starting Class (2026)
What I’d Do on Different GPUs
On a 10 GB or 12 GB GPU, I’d be comfortable starting at 1440p with High/Ultra textures and Quality or Balanced upscaling. I’d monitor VRAM before touching advanced settings.
On an 8 GB GPU, I’d immediately be more conservative with textures. Medium or High can provide a much better overall experience than Ultra if the latter causes streaming pressure.
On a 6 GB GPU, I’d prioritize Medium textures, upscaling, and a sensible FPS target.
And on older hardware, I wouldn’t try to force every UE5 feature to maximum just because the game allows it.
That’s one of the easiest ways to turn a perfectly playable game into a stuttering mess.
Star Wars Zero Company Armor Guide: How to Break Enemy Armor Fast
Final Thoughts
Star Wars Zero Company doesn’t need to run at an absurdly high frame rate to feel good. What it needs is consistent frame delivery.
After playing a lot of demanding PC releases, I’ve become much less interested in chasing the biggest FPS number possible. I’d rather have a locked 60 or 90 FPS experience with clean frame pacing than watch the counter jump between triple digits while the camera keeps hitching.
Start with the simple fixes: clear the shader cache, reduce unnecessary VRAM pressure, establish a realistic FPS cap, and disable overlays. If those changes aren’t enough, then move on to more advanced Unreal Engine configuration tweaks.
Most importantly, change one thing at a time.
That way, if Star Wars Zero Company suddenly becomes smoother, you’ll actually know why.