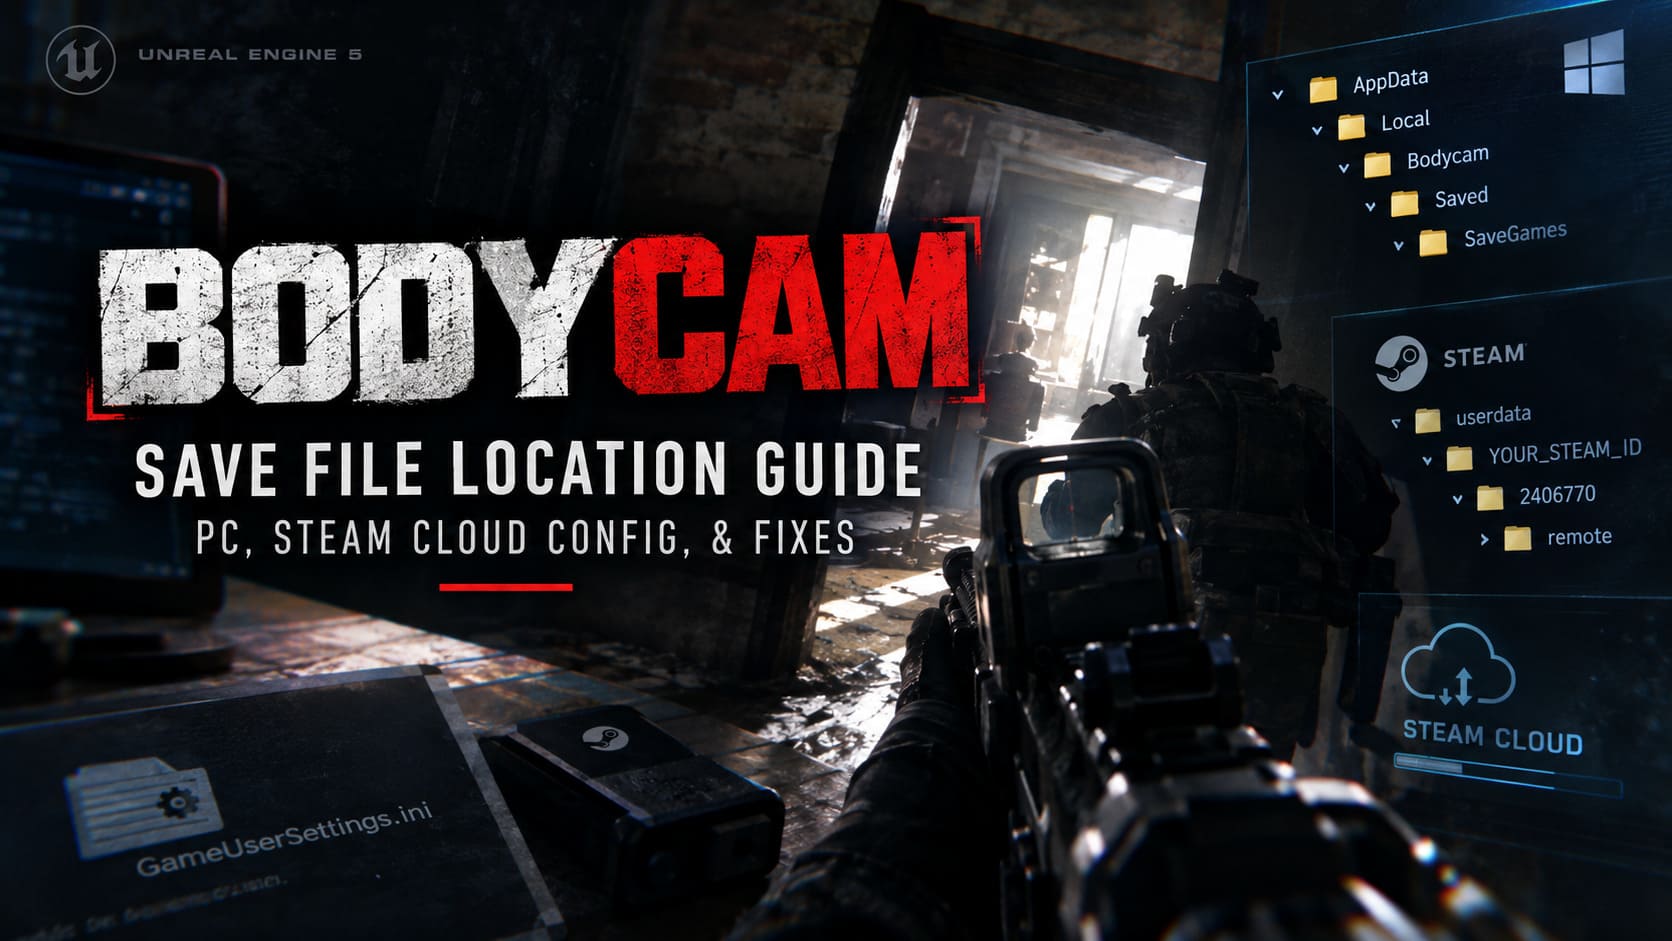
Bodycam Save File Location Guide: PC, Steam Cloud Config, & Fixes
I’ve learned this lesson the hard way. You spend dozens of hours climbing ranks, dialing in perfect sensitivity, tweaking graphics until the game finally runs smoothly… and then one update, one Windows reinstall, or one Steam Cloud conflict wipes everything.
Bodycam is built on Unreal Engine 5, and while that’s fantastic for visuals, it also means the game relies on several different folders for saves, settings, cached shaders, and Steam synchronization. If you don’t know where those files live, troubleshooting becomes a guessing game.
The good news? Bodycam keeps its user data in predictable locations. Once you know the folder structure, backing up your progression takes less than a minute, restoring settings is simple, and fixing corrupted configuration files becomes much easier.
This guide covers everything you actually need: save locations, configuration folders, Steam Cloud files, manual backups, restores, and the most common save-related fixes on Windows PC.
Where Bodycam Saves Are Stored on Windows PC
Unlike the installation directory inside Steam, Bodycam stores player-specific information inside Windows Local AppData. This keeps updates separate from your personal profile and allows Steam to replace game files without touching local user data.
The default save directory is:
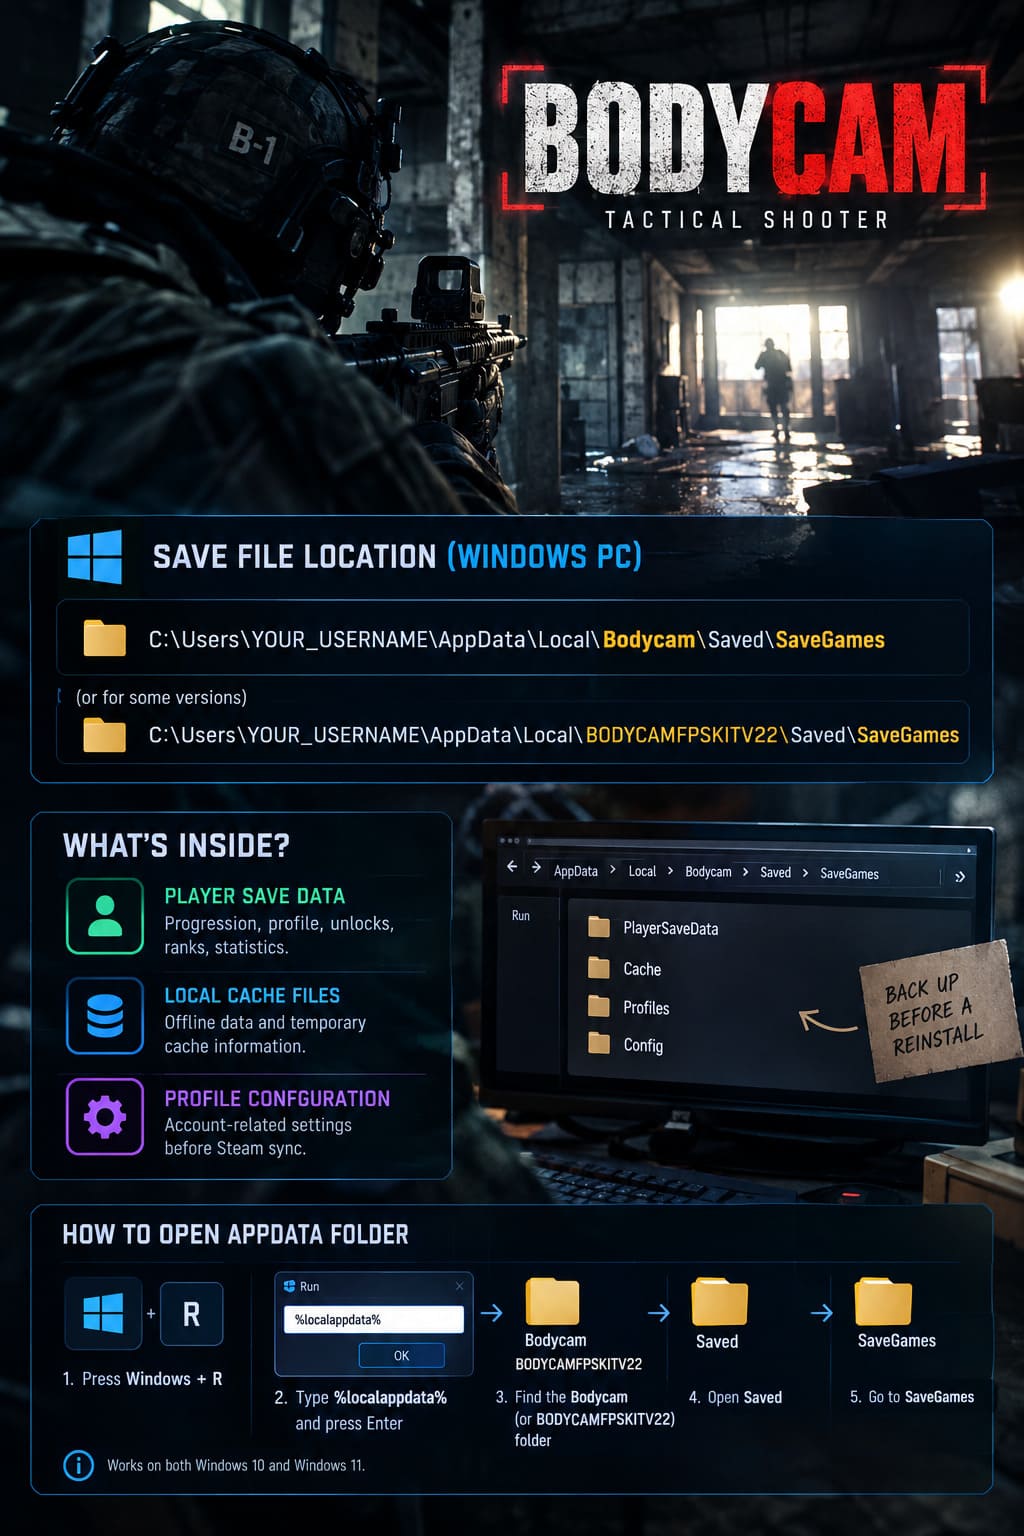
C:\Users\YOUR_USERNAME\AppData\Local\Bodycam\Saved\SaveGames
Some versions of the game, especially earlier Unreal Engine builds, may use:
C:\Users\YOUR_USERNAME\AppData\Local\BODYCAMFPSKITV22\Saved\SaveGames
If you see either folder, it’s completely normal depending on the game’s build.
What’s Inside the SaveGames Folder?
This folder usually contains files responsible for player progression, profile information, unlocks, local cache data, temporary offline statistics, and configuration data that Bodycam references before synchronizing with Steam Cloud.
| File Type | Purpose |
|---|---|
| Player Save Data | Stores progression, profile information, unlocks, ranks, and statistics. |
| Local Cache Files | Contains offline gameplay data and temporary cache information. |
| Profile Configuration | Holds account-related local settings before Steam synchronization. |
If you’re moving to a new PC or reinstalling Windows, this is the first folder you should back up.
Fastest Way to Open the Hidden AppData Folder
Windows hides the AppData folder by default, but you don’t need to enable hidden folders permanently. The fastest method is using Windows Run.
Quick Access Steps
- Press Windows + R.
- Type the following command:
%localappdata%
- Press Enter.
- Locate the Bodycam or BODYCAMFPSKITV22 folder.
- Open Saved → SaveGames.
You’re now inside the folder containing your local Bodycam profile.
This shortcut works identically on Windows 10 and Windows 11.
Bodycam Configuration File Location
Your save files aren’t the only important files. Graphics settings, controls, audio levels, fullscreen mode, resolution, and display preferences are stored inside a dedicated configuration folder.
The default configuration directory is:
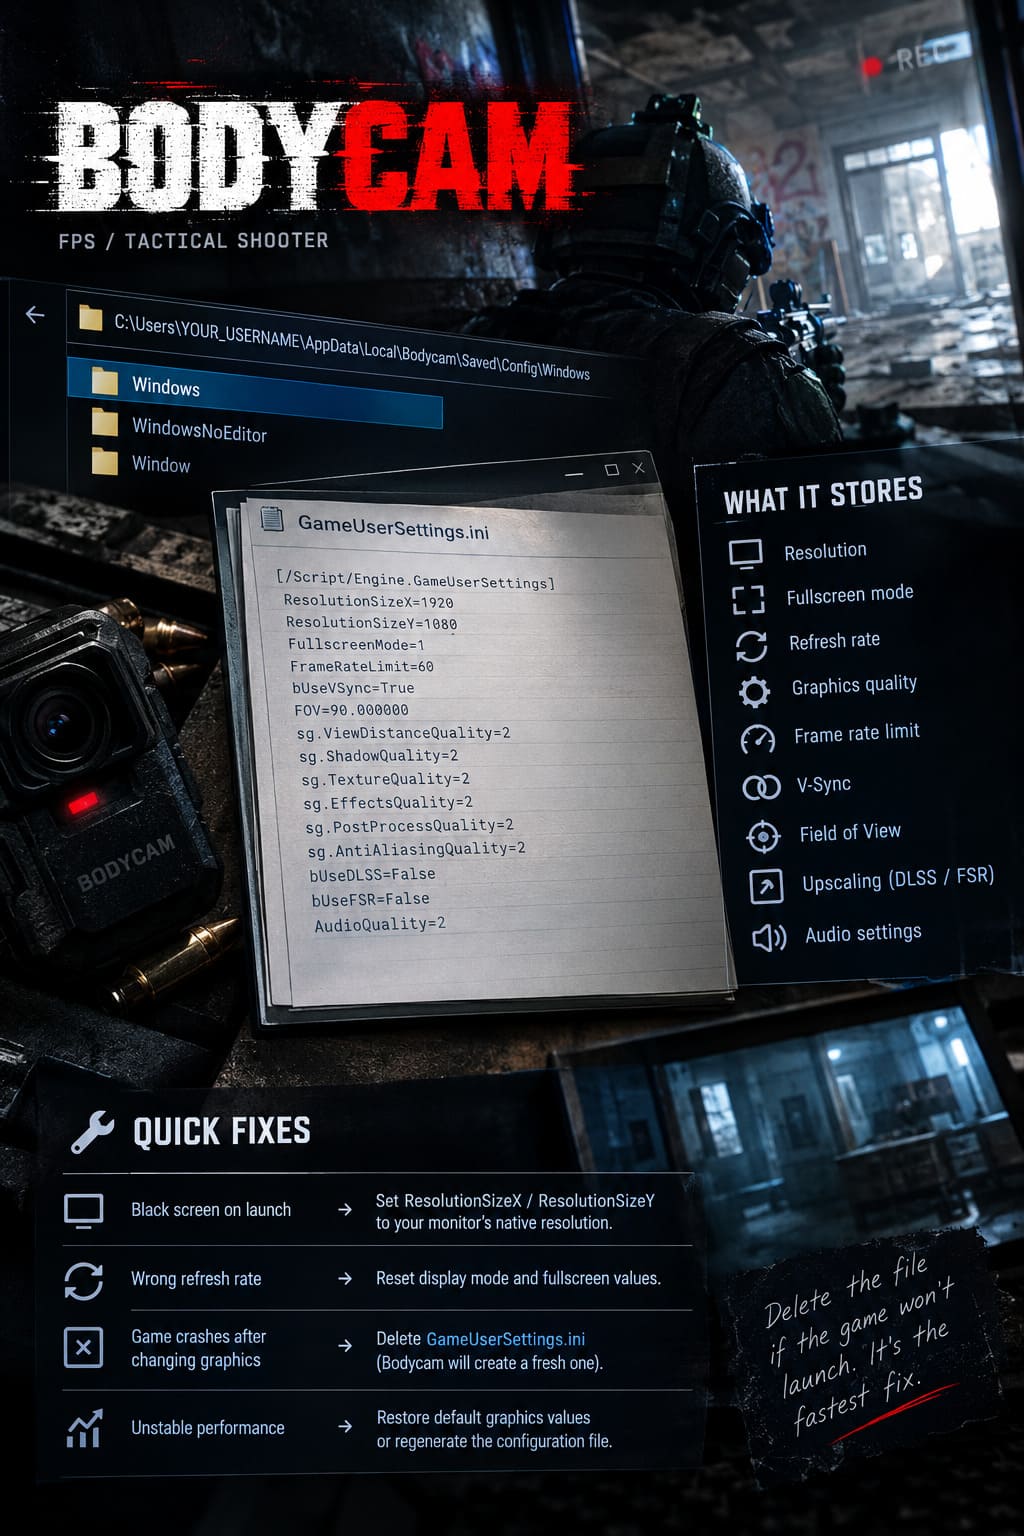
C:\Users\YOUR_USERNAME\AppData\Local\Bodycam\Saved\Config\Windows
Depending on the Unreal Engine build, the configuration folder may also appear as:
WindowsNoEditor
or
Window
The folder name can change between builds, but the important configuration files remain the same.
GameUserSettings.ini Is the Most Important File
If you’ve ever launched Bodycam into a black screen after changing graphics settings, enabled an unsupported resolution, or pushed your GPU too hard, this file is usually responsible.
GameUserSettings.ini tells Unreal Engine exactly how to initialize the rendering pipeline every time Bodycam starts.
What GameUserSettings.ini Stores
- Resolution.
- Fullscreen mode.
- Refresh rate.
- Graphics quality preset.
- Frame rate limit.
- V-Sync.
- Field of View.
- Upscaling settings such as DLSS or FSR.
- Audio configuration.
Because it’s a standard text file, you can edit it with Notepad.
Useful Fixes Inside GameUserSettings.ini
| Problem | Recommended Fix |
|---|---|
| Black screen on launch. | Set ResolutionSizeX and ResolutionSizeY to your monitor’s native resolution. |
| Wrong refresh rate. | Reset display mode and fullscreen values. |
| Game crashes after changing graphics. | Delete GameUserSettings.ini so Bodycam generates a fresh configuration. |
| Performance became unstable after tweaking settings. | Restore default graphics values or regenerate the configuration file. |
If the game refuses to launch after experimenting with graphics settings, deleting GameUserSettings.ini is often the quickest solution. Bodycam automatically creates a clean version during the next launch.
How Steam Cloud Works in Bodycam
Steam Cloud is incredibly useful until synchronization goes wrong. Bodycam integrates directly with Valve’s Steam Cloud system so your settings and progression can follow your Steam account between multiple computers.
The Steam AppID for Bodycam is:
2406770
This number identifies Bodycam inside Steam’s synchronization infrastructure.
Steam Cloud Local Cache Location
Steam keeps a synchronized cache on your PC before uploading data to its servers.
The default path is:
C:\Program Files (x86)\Steam\userdata\YOUR_STEAM_ID\2406770\remote
This folder contains Steam Cloud copies of configuration and synchronization files.
Why This Folder Is Important
Steam constantly compares three different versions of your Bodycam profile:
- Your local AppData save.
- The Steam userdata cache.
- The online Steam Cloud version.
If one version appears newer, Steam may ask which copy should overwrite the other. Choosing incorrectly can replace newer progress with older data.
When You Should Disable Steam Cloud
Steam Cloud isn’t something you should leave disabled forever, but there are several situations where temporarily turning it off is the safest option.
Disable Steam Cloud if you’re:
- Restoring an older backup.
- Resetting corrupted settings.
- Testing configuration edits.
- Starting with a clean local profile.
- Troubleshooting synchronization conflicts.
How to Disable Steam Cloud
- Open Steam.
- Go to your Library.
- Right-click Bodycam.
- Select Properties.
- Stay on the General tab.
- Find the Steam Cloud section.
- Toggle synchronization Off.
Re-enable Steam Cloud only after confirming your restored files and settings are working correctly.
How to Back Up Bodycam Saves Before Updates
Every experienced PC gamer has a backup routine. Seasonal updates, Windows reinstalls, SSD upgrades, or even graphics driver clean installs can occasionally corrupt local files or trigger Steam Cloud conflicts.
Creating a backup takes less than a minute.
Manual Backup Guide
- Exit Bodycam completely.
- Close Steam.
- Press Windows + R.
- Type
%localappdata%. - Open the Bodycam folder.
- Copy the entire Saved folder.
- Paste it into a safe location.
Recommended backup locations include:
- Desktop backup folder.
- External SSD.
- USB drive.
- OneDrive.
- Google Drive.
Rename the backup using today’s date for easy rollback.
Bodycam_Backup_2026_09_06
Keeping multiple dated backups makes recovering older progression much easier if a future patch introduces save issues.
How to Restore Your Bodycam Progress
If your profile disappears after reinstalling Windows or after a problematic update, restoring your saved files is straightforward.
Restore Steps
- Disable Steam Cloud temporarily.
- Navigate to:
%localappdata%\Bodycam
- Delete the current Saved folder.
- Copy your backup Saved folder into the Bodycam directory.
- Launch Steam.
- Enable Steam Cloud again.
- If Steam reports a synchronization conflict, select Upload Local Files to Steam Cloud.
This tells Steam that your restored files are the newest version and should replace outdated cloud copies.
Understanding Steam Cloud Sync Conflicts
This warning window is where many players accidentally lose their progress.
| Steam Cloud Option | What Happens |
|---|---|
| Download From Steam Cloud | Steam replaces your local save with the cloud version. |
| Upload Local Files | Your current local save becomes the new Steam Cloud version. |
Which Option Should You Choose?
Select Upload Local Files if you’ve restored a backup or know your local files contain newer progression.
Select Download From Steam Cloud only if you’re absolutely certain the cloud copy is newer than your local files.
Always double-check timestamps before making a decision.
Best Practice Before Reinstalling Windows
Steam Cloud is useful, but it should never be your only backup strategy.
Keep at least two copies of your Bodycam profile.
- Offline Backup: Copy the Saved folder to another physical drive.
- Cloud Backup: Compress the Saved folder into a ZIP archive and upload it to cloud storage.
If Steam Cloud becomes corrupted or syncs the wrong files, you’ll still have a clean manual backup ready to restore.
Fixing Bodycam Progress Reset After an Update
This is one of the most frustrating issues players encounter after major patches.
Common Symptoms
- Rank resets to zero.
- Cosmetics disappear.
- Settings return to default.
- Statistics are missing.
Why It Happens
- Steam Cloud synchronization mismatch.
- Save structure changes after updates.
- Game crash during shutdown.
- Corrupted local cache.
What You Should Do Immediately
- Close Bodycam immediately.
- Do not continue playing.
- Open:
%localappdata%\Bodycam\Saved\SaveGames
- Inspect Steam userdata:
2406770\remote
- Restore the newest backup if necessary.
Continuing to play after a reset can overwrite recoverable save files with a brand-new empty profile.
Bodycam Settings Reset Every Time You Launch the Game
Another common issue is graphics, controls, or sensitivity resetting after every restart.
Possible Causes
| Cause | Solution |
|---|---|
| Steam Cloud overwriting configuration files. | Disable Steam Cloud temporarily and test local settings. |
| GameUserSettings.ini is read-only. | Open Windows Properties and remove the Read-only attribute. |
| Windows permission conflict. | Run Steam once as Administrator. |
| Corrupted configuration file. | Delete GameUserSettings.ini and let Bodycam regenerate it. |
How to Remove Read-Only
- Right-click GameUserSettings.ini.
- Select Properties.
- Uncheck Read-only.
- Click Apply.
This small setting often fixes configuration changes refusing to save.
Steam Profile Names With Special Characters Can Cause Save Problems
It sounds strange, but Unreal Engine has occasionally struggled with usernames containing unusual Unicode symbols or emojis.
Possible Symptoms
- Settings never save.
- Configuration files fail to update.
- Profile resets every launch.
Recommended Fix
Temporarily change your Steam display name to plain letters and numbers, launch Bodycam so it regenerates configuration files correctly, and verify that settings are saving.
After everything works normally, you can restore your preferred Steam display name.
Antivirus or Windows Security Blocking Save Files
Windows Security’s ransomware protection can occasionally prevent Bodycam from writing files into the AppData directory.
Check Controlled Folder Access
- Open Windows Security.
- Select Virus & Threat Protection.
- Open Ransomware Protection.
- Click Manage Controlled Folder Access.
If this feature is enabled, Bodycam may be blocked from creating or updating save files.
Add Exceptions
Add Bodycam and Steam to your allowed applications list.
- Bodycam executable.
- Steam executable.
- Bodycam AppData folder.
This prevents Windows Security from interfering with save creation or configuration updates.
Quick Bodycam Directory Reference
| Folder or File | Location |
|---|---|
| Save Files | %localappdata%\Bodycam\Saved\SaveGames |
| Configuration Files | %localappdata%\Bodycam\Saved\Config\Windows |
| GameUserSettings.ini | Inside the Config folder. |
| Steam Cloud Cache | Steam\userdata\YOUR_STEAM_ID\2406770\remote |
| Steam AppID | 2406770 |
Keeping these paths bookmarked saves time whenever you need to troubleshoot Bodycam.
How to Fix Bodycam Asset Loading Freeze: Best SSD Specs & Stutter Solutions (2026 Guide)
Tips for Keeping Your Bodycam Profile Safe
After hundreds of hours in competitive shooters, I’ve stopped relying on luck. A couple of simple habits make save problems much less painful.
Do These Things Regularly
- Back up the Saved folder before every major Bodycam update.
- Leave Steam Cloud enabled during normal gameplay.
- Disable Steam Cloud only while restoring backups or editing configuration files.
- Keep one backup outside your Windows drive.
- Delete GameUserSettings.ini if graphics settings prevent the game from launching.
Avoid These Mistakes
- Continuing to play after noticing missing progression.
- Choosing the wrong Steam Cloud version during a sync conflict.
- Editing configuration files while Bodycam is running.
- Keeping only one copy of your save data.
Those four mistakes account for a huge percentage of save recovery problems players run into after updates.
Bodycam 4K Graphics Settings Guide For Max Photorealism (2026)
Final Thoughts
Bodycam’s Unreal Engine 5 file structure is surprisingly easy to work with once you know where everything is stored. Your SaveGames folder protects progression, ranks, cosmetics, and local profile information, while GameUserSettings.ini controls nearly every graphics and display setting the game loads during startup.
Steam Cloud adds another layer of protection through AppID 2406770, but it’s also the source of many synchronization headaches when local and cloud versions stop matching. Understanding how the local userdata cache works makes those conflicts much easier to resolve without sacrificing your progress.
If you’re serious about Bodycam, treat your save folder like any other valuable game asset. Create dated backups before major patches, keep your configuration files clean, verify Steam Cloud conflicts before clicking anything, and don’t hesitate to regenerate corrupted settings when the game starts behaving strangely.
A quick backup today can save dozens of hours of progression tomorrow, especially in a competitive shooter where rebuilding unlocks and statistics from scratch is the last thing anyone wants to do.