Star Wars Zero Company Action Points Guide: Master the AP Economy
If there is one thing that will make or break a mission in Star Wars Zero Company, it is not your blaster, your favorite Operator, or even the quality of your squad build. It is how well you spend your Action Points.
After spending a lot of time with tactical games, I’ve learned one unpleasant truth: players rarely lose because they have no options. They lose because they waste the options they already have. Zero Company is very much that kind of game.
The combat looks familiar if you have played XCOM, Marvel’s Midnight Suns, or other turn-based strategy games, but Zero Company puts a lot of pressure on the action economy. Every movement, shot, support ability, and defensive decision matters. Once you understand the AP system, however, the battlefield starts to feel much more flexible.
How Action Points Work in Star Wars Zero Company
The basic rule is refreshingly simple.
Each standard Operator starts a turn with 3 Action Points. With a normal four-person squad, that gives you 12 AP across the entire team at the beginning of the round.
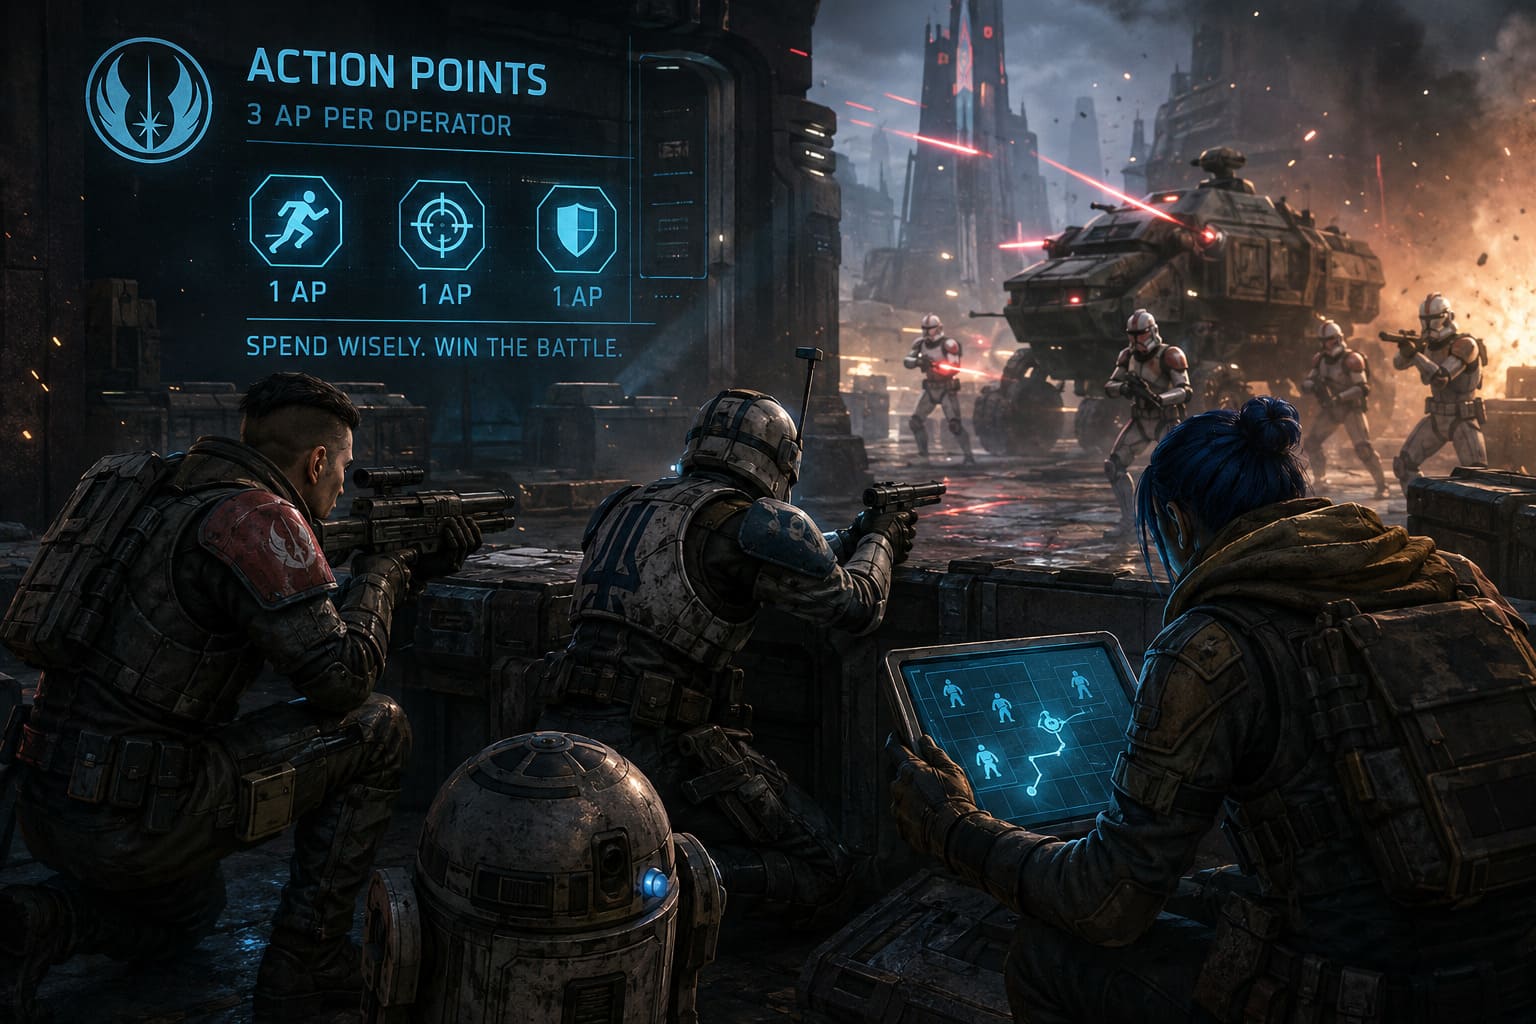
That sounds like a lot until you start spending it.
Move too far, and suddenly you don’t have enough AP to fire. Take a shot too early, and your Operator may be stranded in the open. Spend everything attacking and you might discover that you have no way to reach cover afterward.
The important thing is that AP isn’t tied to a rigid character turn. You can decide how to spend your points and in what order.
For example, an Operator can:
- Move into position, fire, then move again.
- Fire multiple times without moving.
- Spend all 3 AP on a long movement.
- Combine attacks, movement, abilities, and defensive actions depending on the situation.
Personally, this is one of my favorite things about the system. It encourages you to think about the entire turn rather than simply asking, “What should this character do?”
The better question is: “What should my whole squad accomplish before I end the turn?”
AP Costs You Need to Know
The exact value of every action becomes important once fights get difficult. Here’s the general breakdown.
| Action | Typical AP Cost | My Take |
|---|---|---|
| Short Movement | 1 AP | Cheap and flexible |
| Extended Movement | 2 AP | Useful, but plan your follow-up |
| Maximum Movement | 3 AP | Leaves no room for another action |
| Standard Attack | 1 AP | Excellent for damage efficiency |
| Grenade / Utility | 1 AP | Strong when it creates team value |
| Objective Interaction | Usually 1 AP | Don’t forget it during mission pressure |
| Overwatch | 1 AP | Best used as a final action |
Movement deserves special attention because the tactical grid effectively divides your available distance into AP thresholds. A short reposition might cost one point, while pushing the same Operator farther can consume two or all three.
This is where passive abilities can become surprisingly powerful. Something like the Assault specialization’s Fleet of Foot can increase movement distance, meaning the same AP investment can produce a much better tactical position.
That may sound minor on paper. It isn’t.
In tactical games, one extra tile can be the difference between safe cover and a dead Operator.
Shooting Three Times Is More Useful Than It Sounds
Because standard attacks generally cost 1 AP, an Operator who stays in position can potentially attack three times during a turn.
That’s a huge amount of pressure for a single character.
Of course, blindly firing three times isn’t always the correct play. Sometimes the best move is to shoot once and reposition. Sometimes you should spend AP setting up a defensive position. And sometimes your target is better handled by another Operator.
Still, the possibility of three attacks gives you an important tactical option.
This is especially interesting when you’re using weapons or builds designed around generating Advantage. A character that can repeatedly deal damage may contribute much more to the squad than the raw damage number suggests.
And that leads to one of the most important systems in the entire combat loop.
Advantage Is the Resource You Shouldn’t Ignore
If AP is your personal spending money, Advantage is the squad’s shared bank account.
The squad can build Advantage by successfully damaging enemies. That creates an interesting relationship between normal attacks and your more powerful abilities.
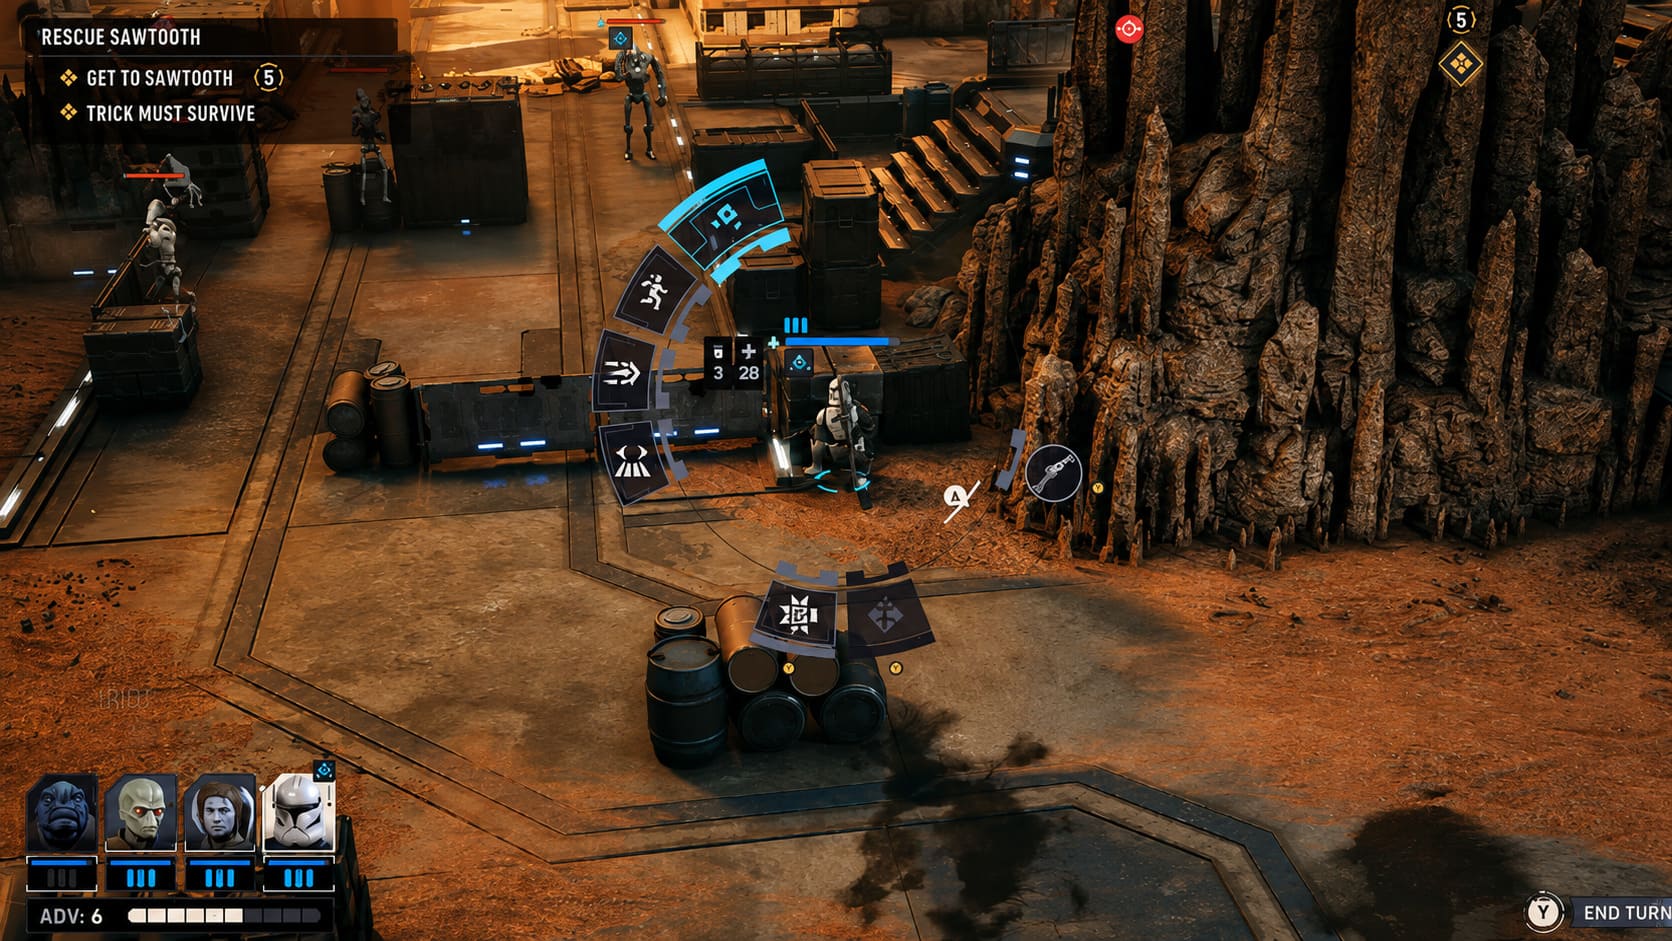
You aren’t simply asking:
“Do I have enough AP to use this?”
You also need to ask:
“Can I generate enough Advantage to make the next part of my turn explosive?”
The best part is that Advantage-based abilities don’t simply eat into your normal AP economy.
That means you can spend AP on movement and weapon attacks while using Advantage for additional tactical effects. Properly managed, the two systems complement each other instead of competing for the same resource.
Call for Backup Is Free Value
One mechanic I would recommend learning as early as possible is Call for Backup.
The important word here is free.
The assist costs 0 AP, allowing another Operator to participate in a coordinated attack without reducing the active character’s normal action economy.
That is exactly the kind of mechanic experienced tactical players should abuse.
A free attack isn’t merely extra damage. It can help:
- Finish weakened enemies.
- Build Advantage.
- Improve character Bonds.
- Create better firing opportunities.
- Remove a dangerous target without sacrificing your main turn.
Since it can be used once per turn by an Operator, there is very little reason to leave this resource sitting unused when the situation allows it.
If you are finishing your turn with Call for Backup available, I’d seriously ask yourself whether you’re leaving free value on the table.
How to Break the 3 AP Limit
Here’s where Zero Company gets much more interesting.
The standard limit is 3 AP at the start of a turn, but that doesn’t mean your effective number of actions has to stop there.
Certain abilities, classes, and character interactions can effectively expand your action economy.
This is the difference between playing the game at a basic level and really understanding its systems.
Astromechs Can Supercharge Your Turn
Astromechs aren’t simply cute utility robots that happen to exist in the Star Wars universe.
They can become a major part of your AP strategy.
Abilities such as Built-in Comlink and Coordinated Support allow Astromechs to contribute utility and potentially help distribute action resources to other members of the squad.
That makes them particularly valuable alongside Operators who get enormous value from one additional action.
Giving an extra AP to a character who is already positioned perfectly can be much more powerful than giving it to someone who needs to spend the point simply getting into position.
This is a general rule I use in tactical games:
Don’t just create more actions. Create more valuable actions.
Hawks Can Manipulate the Action Economy
Hawks, as the leader of Zero Company, also has tools for improving the team’s action economy.
One example is Pico-5, which can be used to grant an additional Action Point to another squad member.
This creates some really fun tactical possibilities.
Imagine a Heavy already positioned behind good cover with an enemy almost dead. Instead of accepting the normal AP limit, Hawks can help push that Operator beyond the expected number of actions.
Suddenly, a character who looked finished for the turn can become the centerpiece of the attack.
These are the moments that make tactical combat satisfying for me. You’re not just following the game’s rules. You’re finding ways to bend the economy in your favor.
Kabb and the Joy of Action Refunds
Some abilities don’t grant AP directly. Instead, they refund the AP you already spent.
Kabb’s Uppercut is a good example.
If the attack successfully executes an enemy, the sequence can refund the Action Points invested in it. That opens the door to chaining attacks and turning a single elimination into the beginning of another offensive sequence.
This is exactly the kind of ability you want to build a turn around.
Instead of thinking, “I have 3 AP, so I can do three things,” you start thinking:
“Can I spend these 3 AP in a way that gives me another 3 AP afterward?”
That’s a completely different approach to combat.
Overwatch: Powerful, but Don’t Waste It
Overwatch costs 1 AP and creates a cone-shaped field of fire for the enemy’s turn.
It is a classic defensive tool, but I think players often make the mistake of activating it too early.
If an Operator still has useful actions available, spending AP on Overwatch can unnecessarily restrict the rest of the turn.
In most situations, I prefer to treat Overwatch as the closing move.
Move into position. Attack. Use your utility. Coordinate with the squad. Then, when you’re finished, spend the final AP on Overwatch if the battlefield calls for it.
It gives the Operator something useful to do during the enemy phase without sacrificing actions you could have used during your own turn.
The Biggest AP Mistake: Spending Everything
This is probably the most important piece of advice in this guide.
Do not automatically spend all 3 AP just because you have 3 AP.
Zero Company rewards aggressive play, but tactical aggression isn’t the same thing as pressing the attack button until the resource bar is empty.
Sometimes your final AP should be saved for movement.
Sometimes it should be Overwatch.
Sometimes you should stop attacking because your current position is already perfect.
And sometimes the correct decision is to do less.
That’s especially important because an Operator caught outside cover can become a liability very quickly. A great offensive turn doesn’t matter much if the enemy immediately punishes your exposed position.
Wounds Make Bad AP Decisions Expensive
The consequences of poor positioning become even more serious because going down isn’t simply a temporary inconvenience.
When an Operator reaches zero health, they can be downed and require assistance from another squad member. Being downed can also contribute to permanent wounds.
Accumulating too many wounds can eventually lead to permanent death, meaning the character may be lost rather than simply recovering between missions.
This makes AP management part of your long-term campaign strategy.
You’re not only trying to win the current firefight.
You’re trying to make sure the people who won it are still around for the next one.
And yes, Hawks is the obvious exception in terms of campaign consequences. Losing the protagonist can trigger a game over, making Hawks’ survival a priority whenever a mission starts going sideways.
Can You Play Star Wars Zero Company on ROG Ally X at 60FPS? Performance Guide
My Favorite Way to Think About the AP Economy
I don’t think the best way to understand Zero Company’s AP system is simply memorizing costs.
Instead, divide your turn into three questions:
1. What absolutely needs to happen?
Maybe an enemy has to die. Maybe an objective must be activated.
2. What can happen for free?
Call for Backup, Bonds, Advantage-based effects, and other mechanics may give you additional value without consuming normal AP.
3. Where does everyone need to finish?
This is the question inexperienced players often forget.
The final position of your squad is just as important as the damage you dealt.
A turn where you kill two enemies but leave three Operators exposed can be worse than a turn where you kill one enemy and establish a nearly perfect defensive position.
Star Wars Zero Company PS5 Pro Graphics vs Performance Mode: Which Is Better?
Final AP Checklist
Before ending a turn, I recommend quickly checking the following:
- Have I used my free Call for Backup opportunity?
- Can any Operator generate or exploit additional AP?
- Am I wasting remaining Advantage?
- Does anyone need to move into better cover?
- Would Overwatch be more valuable than another attack?
- Can I set up a kill that refunds or extends my action economy?
- Am I ending the turn in a position that can survive the enemy phase?
That last question is the one I keep coming back to.
Star Wars Zero Company isn’t really about having the most Action Points. It’s about turning each point into something meaningful.
Three AP can be three mediocre decisions, or they can be the foundation of a devastating sequence involving movement, coordinated attacks, Advantage generation, support abilities, and a perfectly timed defensive finish.
Once you stop treating AP as a simple number and start treating it as your squad’s tactical economy, the combat system becomes much more interesting.
And honestly, that’s where Zero Company starts feeling less like a traditional turn-based shooter and more like the kind of tactical game that makes you stare at the battlefield for thirty seconds before finally saying, “Okay. I think I’ve got it.”