STALKER 2 Cost of Hope DLC: Where to Find Heavy Monolith Armor
If there is one thing STALKER 2: Heart of Chornobyl teaches you the hard way, it is that the Zone does not care how confident you feel. You can walk into an area thinking you are fully prepared, take three steps around a corner, and suddenly find yourself fighting Monolith soldiers while an anomaly field is chewing through your health. The Cost of Hope DLC pushes that survival pressure even further, especially once you start exploring its new territories and heading toward the most dangerous parts of the Zone.
That is exactly why the Heavy Monolith Armor is such a valuable piece of equipment. This is not another suit you pick up, wear for five minutes, and throw into your stash because something with better numbers drops later. The Heavy Monolith Armor is designed for Stalkers who are willing to trade some mobility for serious protection, making it one of the most attractive options for players tackling the tougher encounters introduced in the 2026 expansion.
The annoying part? Getting your hands on it is not exactly a casual shopping trip. The armor is hidden in areas where the game is practically begging you to turn around, and reaching it can involve radiation, anomalies, hostile Monolith forces, mutants, and plenty of ammunition disappearing from your inventory. If you are planning to hunt down the suit, here is what you need to know.
STALKER 2 Cost of Hope Best New Weapons Tier List (Update 2.0)
Why the Heavy Monolith Armor Is Worth Hunting Down
The Cost of Hope DLC raises the stakes considerably. Enemies hit harder, dangerous areas become harder to navigate, and simply carrying enough supplies for a long expedition can become a problem. The old strategy of wearing whatever decent armor you happen to find starts falling apart once you spend more time in the expansion’s nastier locations.
The Heavy Monolith Armor solves a big part of that problem by focusing heavily on protection. Its strength is not subtle: the suit is built to keep you alive when the Zone starts throwing everything it has at you. Ballistic protection, resistance against environmental hazards, and solid defensive characteristics make it particularly useful during prolonged combat encounters.
There is also a practical advantage that I really like. A heavy suit makes sense when your inventory is packed with ammunition, medical supplies, artifacts, and high-end weapons. You are already playing like a walking armory, so having armor that supports that playstyle makes the entire setup feel more coherent.
It is not perfect, though. Mobility and stamina are the price you pay for all that protection. If you are the type of player who sprints everywhere and treats every fight as an excuse to reposition constantly, the weight of the Heavy Monolith Armor can become irritating. Personally, I would rather have the extra protection when exploring the deepest areas of the Zone, but you should know what you are sacrificing.
Before You Search: Make Sure You Can Reach the DLC Areas
There is one important preparation step before you start chasing the armor. You need access to the Cost of Hope content and its expanded areas, including locations connected to the Iron Forest and the territory around the CNPP.
Players should also be careful about progressing too far into the base game’s endgame sequence. Keeping a save before the main game’s point of no return is a smart move because the open-world freedom you need for exploration can disappear once you commit to the final sequence.
If you already have a suitable pre-endgame save, use it. There is nothing worse in STALKER than realizing several hours later that the item you wanted is sitting in an area you can no longer freely access.
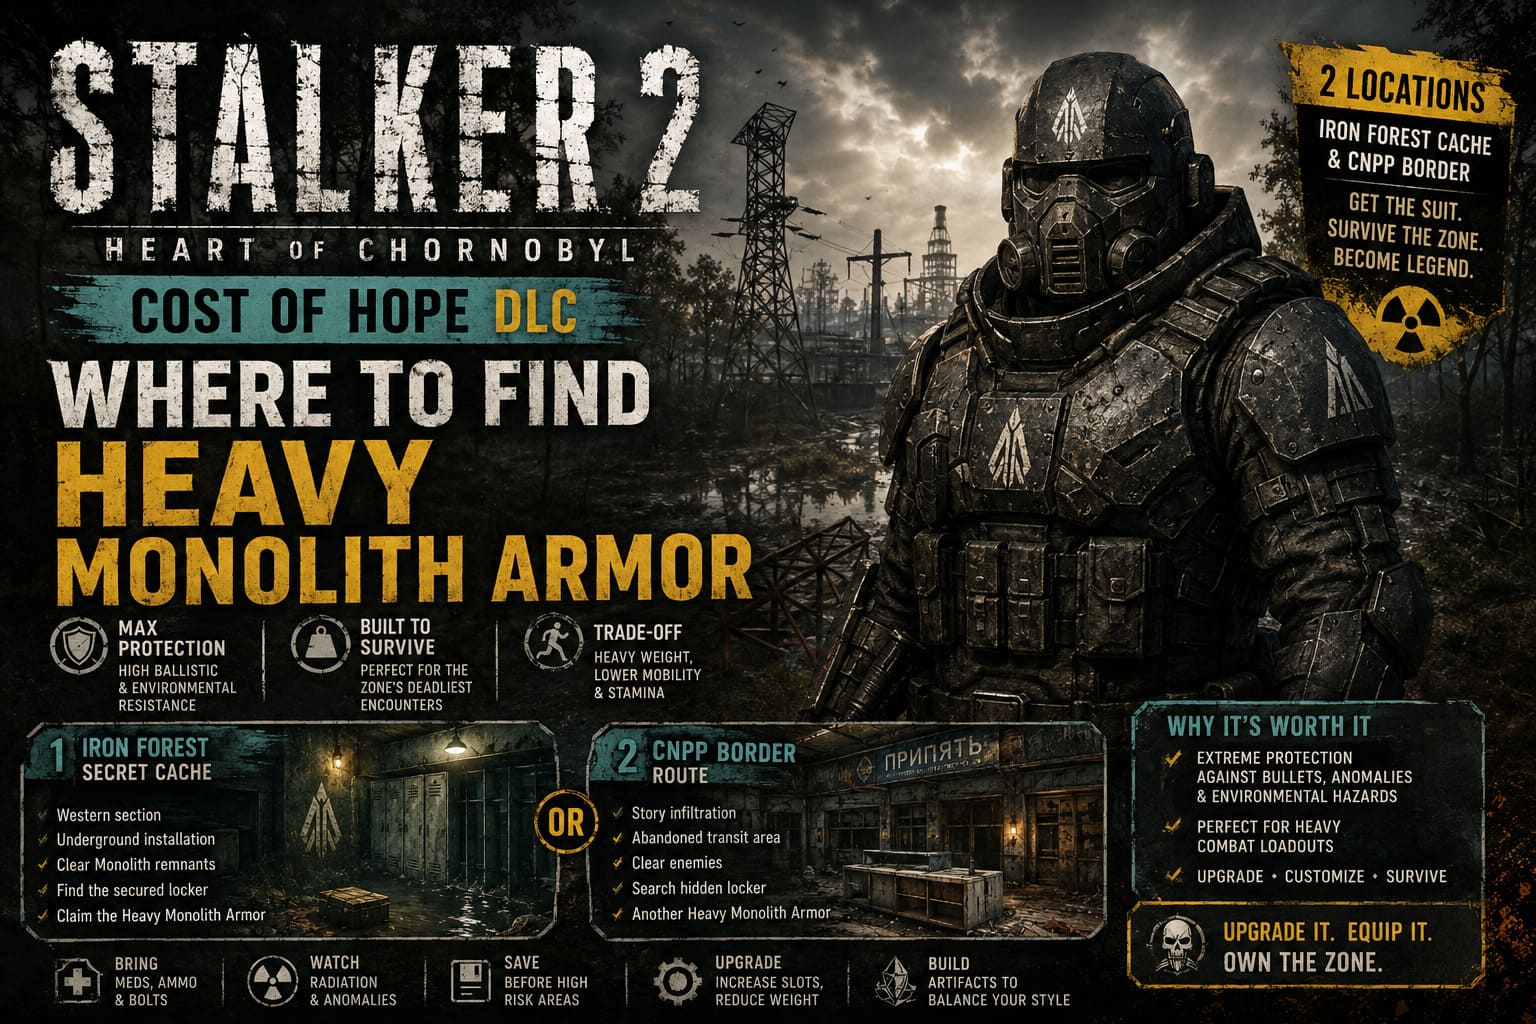
Heavy Monolith Armor Location #1: Iron Forest Secret Cache
The Iron Forest is the first place I would check if your goal is to get the Heavy Monolith Armor as early as possible.
The area itself is exactly the kind of STALKER location that makes you question your life choices. The environment is dangerous, anomalies are waiting to punish careless movement, and hostile enemies can turn an apparently empty structure into a full-blown firefight.
Your objective is to search the western section of the Iron Forest for an abandoned underground installation connected to Monolith operations.
Do not rush toward the structure with your weapon already raised and your sprint button held down. The exterior can contain dangerous electrical and chemical anomalies, so keep your bolts ready and pay attention to your detector. Bring plenty of anti-radiation medication as well. Running out of supplies while still inside the installation is a fantastic way to turn a successful loot run into a desperate escape.
Getting Inside the Installation
The facility is protected by hostile Monolith remnants and potentially dangerous mutants. Clear the immediate area before searching for the entrance. Trying to loot the place while enemies are still roaming around is possible, but it is exactly the kind of STALKER decision that sounds clever until you are bleeding behind a concrete wall.
Once the area is relatively secure, search for a way into the underground section. A flooded utility room or maintenance route can lead down into the subterranean corridors.
This part of the search can be easy to overlook because the interior is dark and cramped. Turn on your flashlight, check side rooms, and do not assume that the first corridor you find is the correct one. STALKER loves hiding valuable gear behind areas that look completely unimportant.
Eventually, you are looking for an old locker room or engineering section behind a secured gate. Depending on how you approach the location, you may need a key or access information connected to a fallen Monolith squad leader.
Once the security barrier is dealt with, search the room carefully.
The Heavy Monolith Armor should be waiting inside alongside other high-tier supplies. Grab the suit, check your inventory weight, and get ready for the trip back out because finding the armor is only half the battle.
Heavy Monolith Armor Location #2: The CNPP Border Route
If you miss the Iron Forest cache, do not panic. There is another opportunity connected to the story-driven portion of the Cost of Hope DLC.
As you move toward the Chernobyl Nuclear Power Plant, the conflict between the factions becomes considerably more intense. This section of the DLC is not exactly a sightseeing tour, either. Expect serious resistance and combat encounters that can burn through ammunition quickly.
During a major infiltration sequence involving Duty and Freedom, Skif moves through an abandoned transit area containing old Monolith defenses. After dealing with the hostile forces in the area, you can gain access to a previously sealed logistics or trading location.
This is where you should start searching.
Move beyond the main barricades and inspect the abandoned station’s back rooms. Pay particular attention to areas that look like old vendor counters, storage spaces, or fenced-off sections. A hidden locker can contain another version of the Heavy Monolith Armor.
The important thing here is not to treat the station as a simple loot room. The surrounding area can be extremely dangerous, and you may still have enemies nearby after the main fight. Heal before searching, reload your weapons, and make sure you have enough ammunition for another engagement.
Which Route Should You Take?
If you have a choice, I would personally go for the Iron Forest location first.
Why? You are getting the armor through exploration rather than waiting for the story to naturally drag you toward the later CNPP section. That can make a significant difference if you want to build a heavy defensive setup for the middle and later portions of the DLC.
The CNPP route is more convenient for players who are already progressing through the relevant missions. There is no reason to backtrack across the entire Zone just because you missed the earlier cache.
| Route | Main Advantage | Main Risk | Best For |
|---|---|---|---|
| Iron Forest | Earlier access through exploration | Heavy anomalies and hostile Monolith forces | Explorers and loot hunters |
| CNPP Border | Connected to story progression | Intense faction combat | Players progressing through the main DLC |
| Iron Forest Cache | Strong early defensive upgrade | Difficult underground search | Prepared Stalkers |
| CNPP Locker | Convenient later opportunity | Dangerous combat zone | Story-focused players |
How to Upgrade the Heavy Monolith Armor
Getting the suit is only the beginning. If you leave the Heavy Monolith Armor completely stock, you are wasting a lot of its potential.
Find a reliable technician and start investing in upgrades. The Cost of Hope economy makes these improvements expensive, so do not burn through your coupons on every little modification you see. Save your money for upgrades that actually complement your playstyle.
Artifact capacity should be one of your priorities. More artifact slots mean more opportunities to customize the suit around survivability, stamina, radiation management, or other useful bonuses.
The armor’s weight is the biggest thing you need to manage. That is why mobility and sprint-related upgrades deserve serious consideration. The worst situation is not being slow during a firefight; it is being unable to sprint away from a mutant pack because your stamina disappeared at exactly the wrong moment.
Best Artifacts for a Heavy Armor Playstyle
The Heavy Monolith Armor works particularly well with artifacts that compensate for its weaknesses.
If you are constantly taking damage, prioritize artifacts that improve survivability or help recover health. If stamina is driving you crazy, build around bonuses that make movement more manageable. Players who spend long periods in hazardous areas should also think carefully about radiation and anomaly resistance rather than blindly stacking offensive benefits.
There is no single perfect artifact loadout. That is one of the better aspects of the STALKER equipment system. A heavy armor build can become a walking tank, but the exact configuration should depend on whether you prefer assault rifles, heavy weapons, aggressive close-range combat, or cautious exploration.
Weapons That Pair Well With the Heavy Monolith Armor
The suit naturally fits a heavier combat loadout.
An upgraded assault rifle gives you reliable performance in most encounters, while heavier weapons can take advantage of the additional carrying capacity. If you are carrying something like an RPG-7U, the Heavy Monolith setup starts feeling particularly appropriate.
The trade-off is obvious: your character becomes less agile.
I would not recommend trying to play this setup like a lightweight stealth Stalker. You are wearing a tank of a suit. Use cover, control the engagement distance, conserve stamina, and let the armor absorb punishment while you methodically eliminate threats.
Common Mistakes to Avoid
The biggest mistake is rushing toward the armor without preparing your inventory.
Bring anti-radiation medication, healing items, ammunition, bolts, and enough free inventory space to actually carry the reward. It sounds obvious, but STALKER players know how quickly a planned expedition can become an inventory-management disaster.
Another mistake is ignoring the environment. The Iron Forest is not dangerous simply because enemies spawn there. Anomalies can be just as deadly, and blindly sprinting through an unfamiliar area can cost you more health than the firefight afterward.
Finally, do not forget to save before entering high-risk locations. Losing a valuable armor pickup because you made one stupid jump or walked into an anomaly field is the kind of mistake that makes you stare at the reload screen in complete silence.
Is the Heavy Monolith Armor the Best Suit in Cost of Hope?
Calling it the absolute best armor for every player would be overselling it.
For a defensive, heavy-combat playstyle, however, it is one of the most compelling options available. The protection and utility make it especially attractive once the DLC starts throwing tougher encounters and environmental hazards at you.
Lightweight armor can still be better for players who prioritize speed, stealth, and stamina. The Heavy Monolith Armor is for the opposite kind of Stalker: the guy who hears gunfire, checks his ammunition, and thinks, ‘Fine, let’s do this.’
That is exactly why I like it.
Final Thoughts
The Heavy Monolith Armor in STALKER 2: Cost of Hope is more than a flashy endgame suit. It changes how you approach dangerous areas, allowing you to survive encounters that would be much more punishing in lighter equipment.
The Iron Forest secret cache is the route I would prioritize if you want the armor through exploration, while the CNPP border location provides another opportunity during the DLC’s story progression. Whichever route you choose, arrive prepared because neither location is designed to hand over top-tier equipment for free.
Upgrade the suit as soon as your technician options allow it, pay attention to its stamina penalty, and build your artifacts around the weaknesses of a heavy setup. Once everything comes together, you get one of the most satisfying STALKER playstyles possible: heavily armed, heavily protected, and just reckless enough to walk straight back into the Zone after surviving the last nightmare.