Zad Archery Skill Tree Optimization: Best Paths and Meta Progression Guide (2026)
There are a lot of incremental games that I can play for twenty minutes, understand the entire loop, and then never touch again. Zad Archery is not one of them.
I went into it expecting another relaxing idle game where you shoot targets, collect numbers, buy upgrades, and watch those numbers become slightly bigger numbers. Instead, I found a surprisingly layered progression system built around combat, crafting, gathering, alchemy, jobs, and, most importantly, a huge skill tree that actually makes you think about where your points are going.
That last part is what really caught my attention.
The Zad Archery skill tree isn’t just a wall of “+5% damage” upgrades. At least when you’re playing efficiently, the order in which you unlock things can completely change the feeling of a run. One build can make your character feel painfully slow, while another can suddenly turn the same content into a screen full of arrows, effects, and rapidly disappearing enemies.
After spending time experimenting with different progression routes, I came away with a pretty simple opinion: don’t build your character around the biggest number you can see. Build around the way the whole progression system feeds itself.
And that’s where this guide comes in.
Why the Skill Tree Matters So Much in Zad Archery
The first thing I noticed about Zad Archery is that the game constantly encourages you to connect different systems.
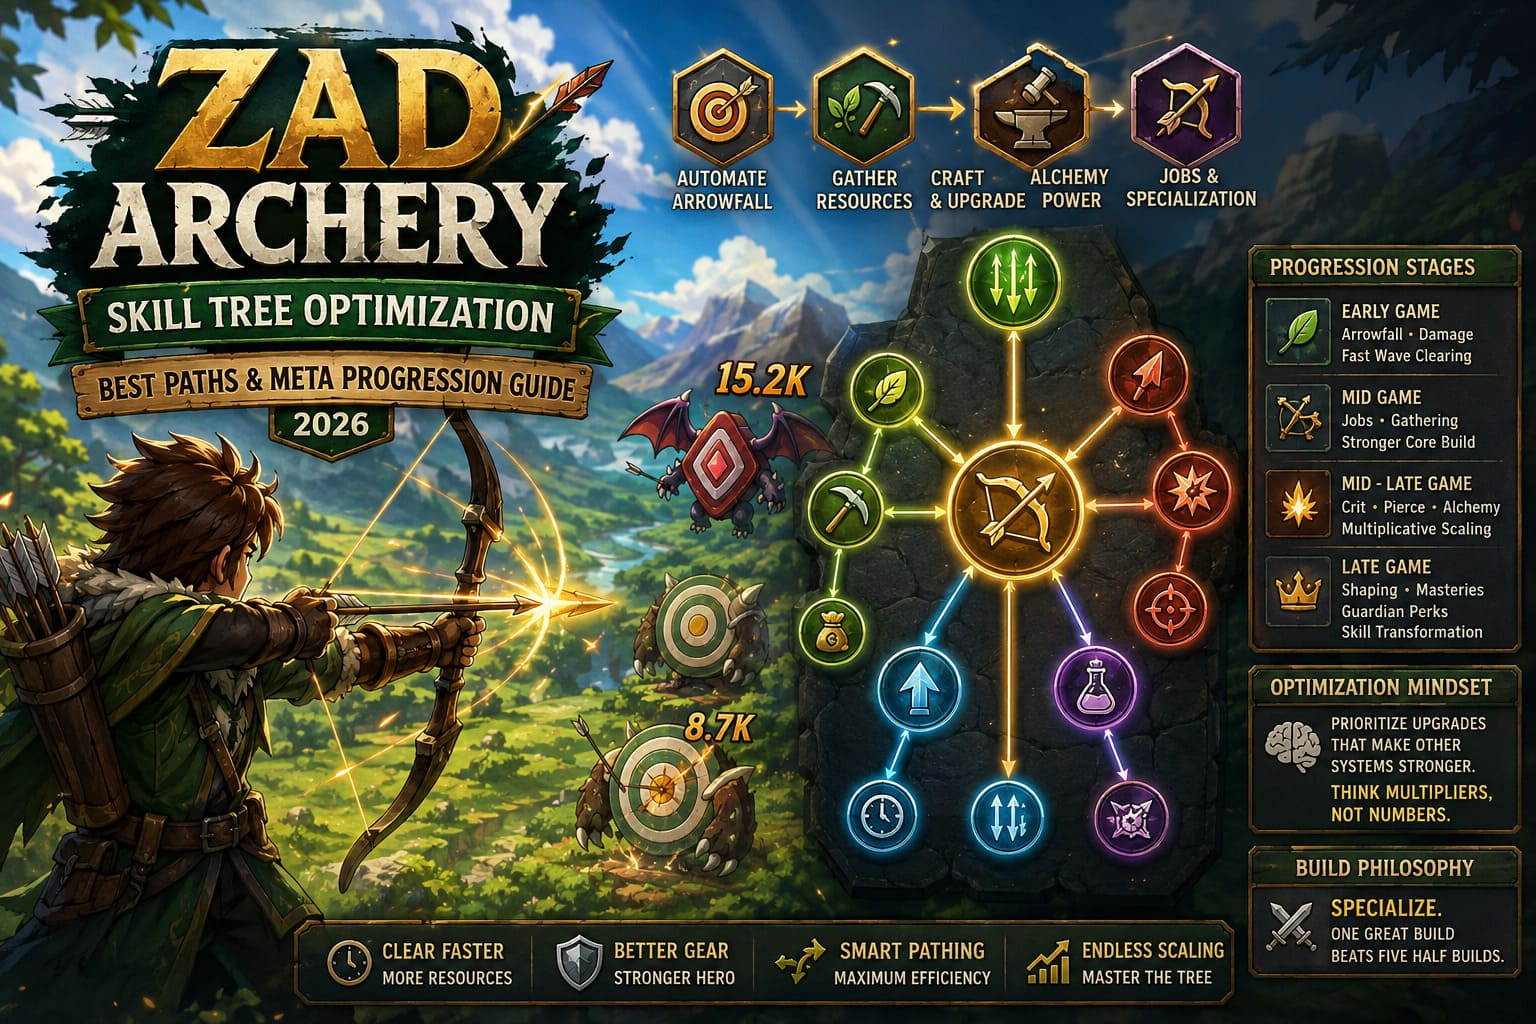
You aren’t simply killing monsters to get stronger. Your combat progression feeds resources into gathering. Gathering supports crafting. Crafting improves your equipment. Alchemy adds another layer of scaling, while Jobs and Guardian-related mechanics can push particular builds even further.
The skill tree sits right in the middle of all of this.
That means a seemingly small utility upgrade can sometimes be more valuable than a straightforward damage increase.
For example, improving Arrowfall early can help you clear waves faster, which means more kills, more resources, faster progression, and ultimately more opportunities to upgrade your character. On paper, a damage node might look stronger. In practice, the cooldown reduction can win simply because you’re doing everything faster.
That’s the kind of optimization I enjoy.
My general rule
If an upgrade makes another system work better, I usually value it more than a simple isolated stat increase.
| Progression Stage | Main Priority | Secondary Focus | What I Want |
|---|---|---|---|
| Early Game | Arrowfall, Damage | Automation | Faster Wave Clearing |
| Early Mid-Game | Living Aim, Jobs | Gathering | Stronger Core Build |
| Mid-Game | Job Specialization | Critical, Pierce, Alchemy | Multiplicative Scaling |
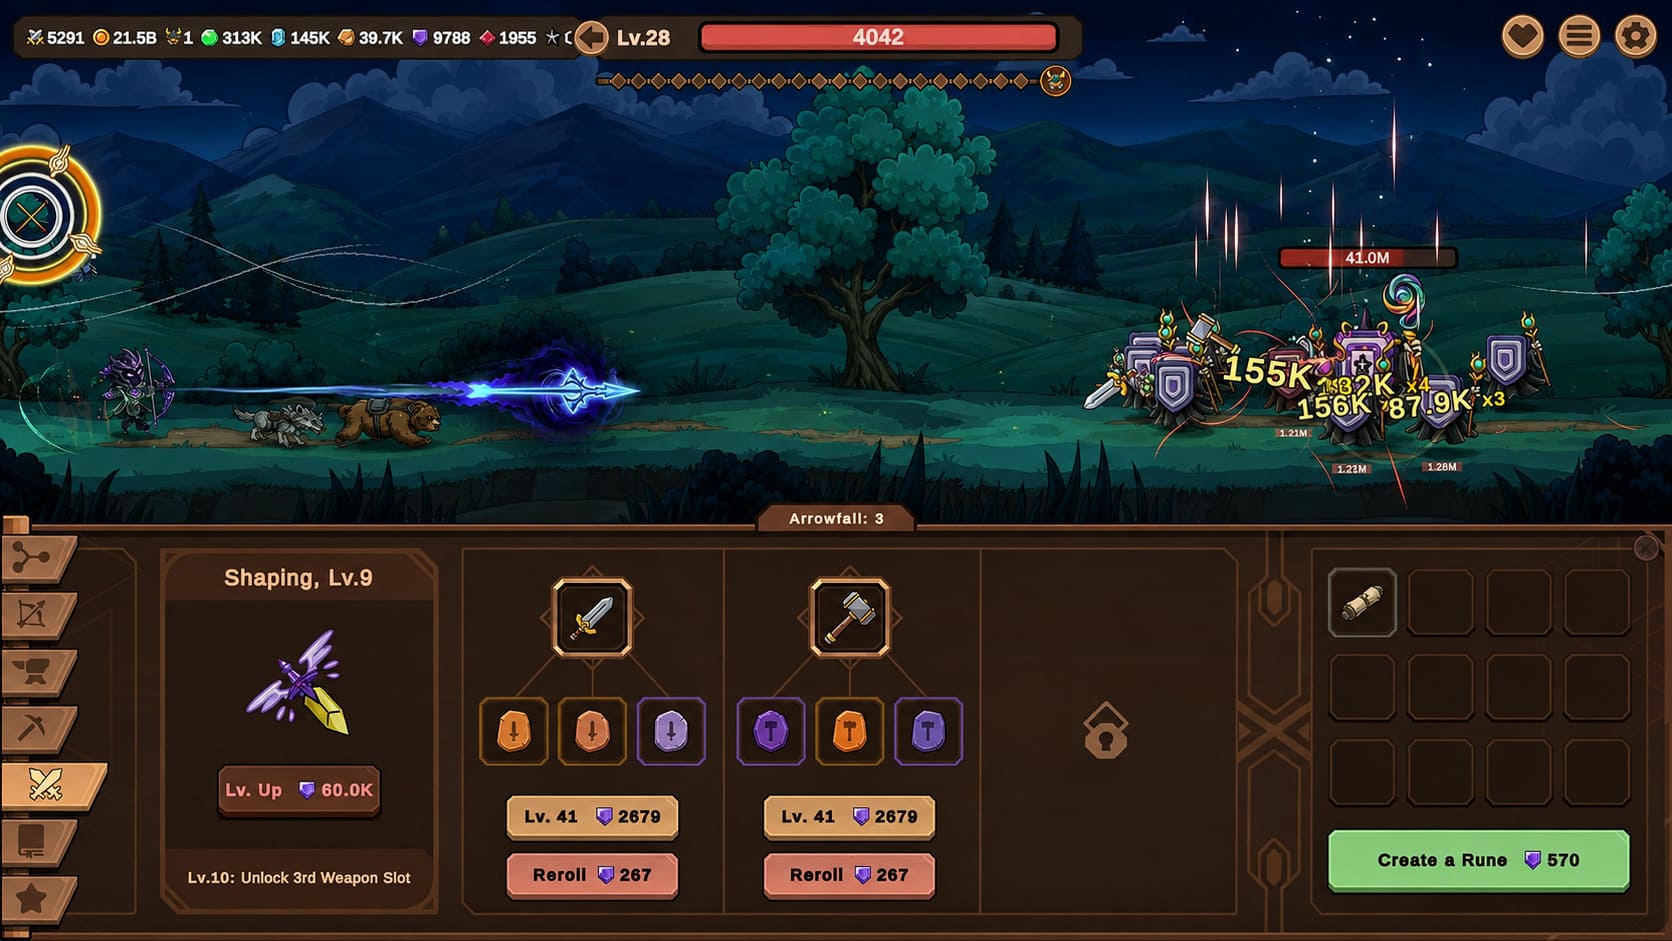
| Late Game | Shaping, Masteries | Guardian Perks | Skill Transformation |
This isn’t a rigid formula, but it’s a very good starting point if you’re playing for efficiency rather than simply clicking whatever node looks attractive.
Early Game: Don’t Overthink Damage
During the opening part of a run, basic arrow damage absolutely matters.
I’m not going to pretend it doesn’t.
When you’re starting with weak attacks and enemies are taking too long to die, raw damage is exactly what you need. But there’s a point where continuously buying damage stops being the best investment.
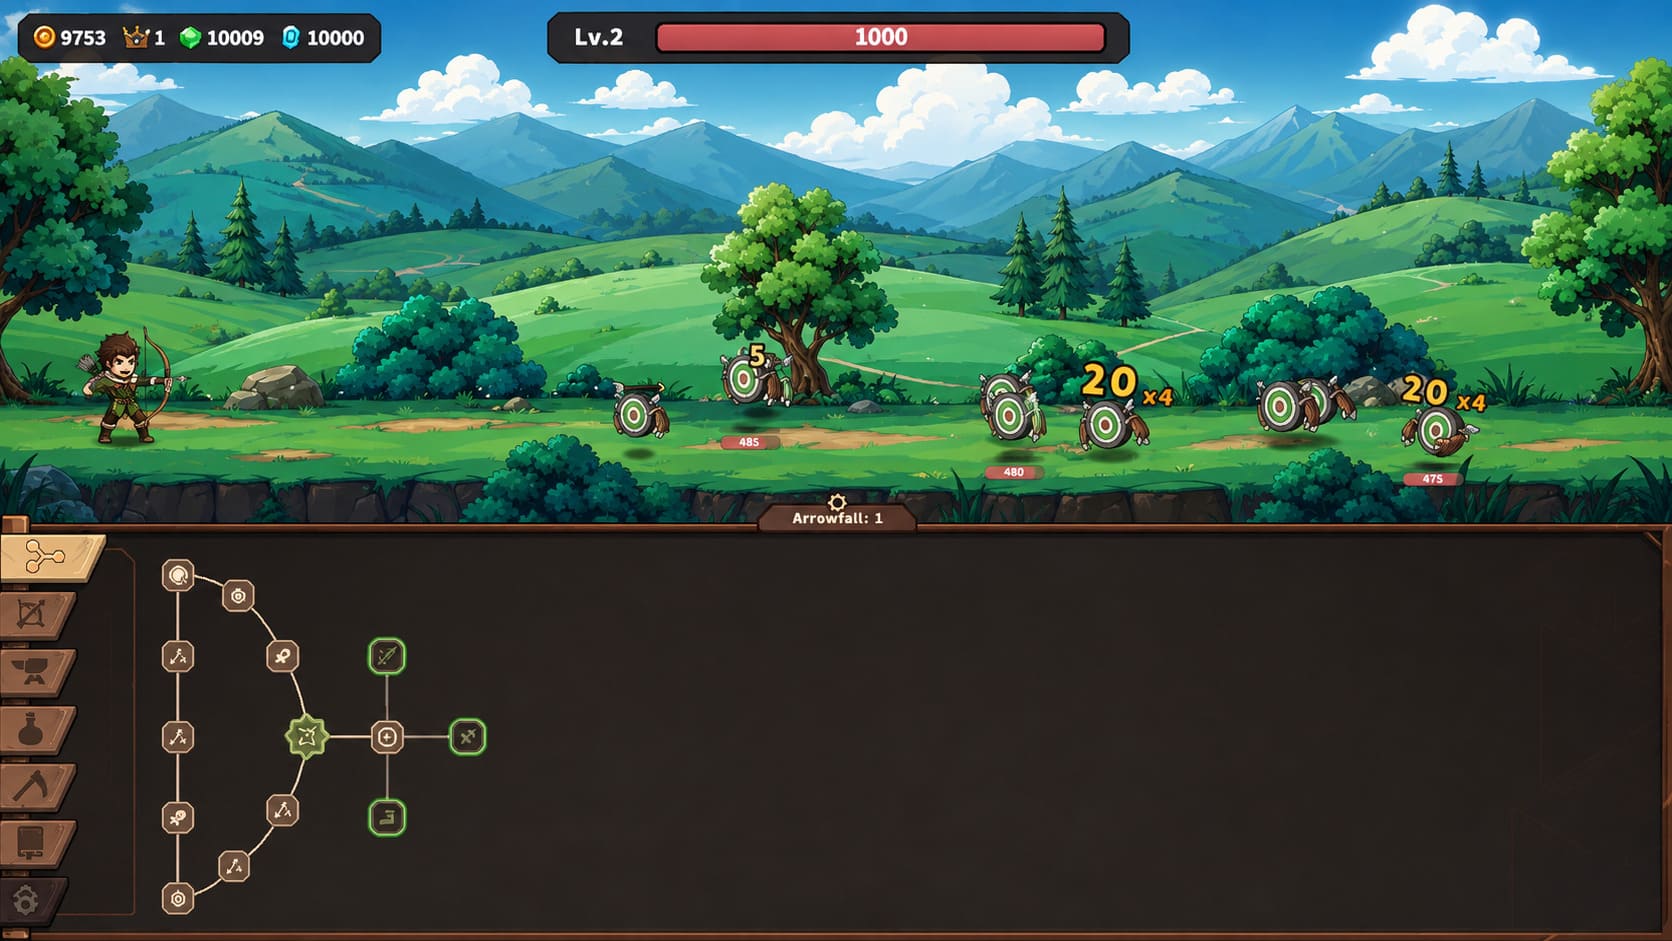
For me, the early-game priority is getting the automated combat loop online as quickly as possible.
That means paying close attention to Arrowfall and its cooldown-related upgrades.
The faster your automated attacks come back, the less time you’re spending waiting for the next big wave-clearing effect. This is especially noticeable when you’re still dealing with relatively weak enemies and every extra second between attacks slows down your entire economy.
I would generally approach the first several points like this:
- Pick up enough Base Arrow Damage to keep normal enemies under control.
- Start investing into Arrowfall refresh or cooldown improvements.
- Move toward the central progression route instead of grabbing every interesting side node.
- Prioritize automation over fancy hybrid builds.
This is one of those situations where efficiency isn’t necessarily exciting at first. You’re setting up the engine.
Once the engine starts running, the rest of the game becomes much more enjoyable.
Living Aim: The Node I Wouldn’t Ignore
If there’s one early progression point that deserves special attention, it’s Living Aim.
The reason I like this kind of upgrade is that it doesn’t simply make the current moment easier. It improves the quality of your combat scaling.
Once your basic automated loop is functioning properly, moving toward Living Aim gives you a much better foundation for the next phase of progression.
This is also where I’d resist the temptation to grab every nearby combat upgrade.
Pathing matters.
The skill tree can make you feel like you’re constantly missing out on something because there’s another shiny node just a few steps away. Don’t fall for it. If you already know which direction you’re building toward, stay on that route.
One efficient path is usually worth more than several mediocre upgrades scattered around the tree.
Gathering Is More Important Than It Looks
This was probably one of the more interesting lessons for me.
At first glance, Mining and Herbing can feel like secondary activities. You’re here to shoot monsters, right? Why should you care about gathering when there are combat upgrades waiting?
Because Zad Archery is constantly feeding one system into another.
The sooner your gathering professions become useful, the sooner they can support crafting and alchemy. And once those systems start contributing meaningful upgrades to your character, the value of the original gathering investment becomes much more obvious.
That’s why I wouldn’t leave Mining and Herbing until the absolute end of your progression.
Getting them online around the transition into the mid-game can save you from a lot of resource bottlenecks later.
In other words:
Combat gets you resources. Gathering improves your resources. Crafting turns those resources into power.
That’s the loop you want to exploit.
The Job System Changes Everything
Once you reach the Archer Jobs system, the game starts feeling considerably deeper.
This is the point where I recommend making an actual decision about what kind of character you want to play.
There are multiple Job directions, and trying to build all of them simultaneously sounds flexible but usually creates a character that isn’t particularly impressive at anything.
I much prefer specialization.
The two styles that stand out to me are a high-speed precision build and an alchemy-focused setup.
The Sniper Approach
If you enjoy watching individual attacks hit extremely hard, the sniper-style route is incredibly satisfying.
I’d prioritize things like:
Pierce → Range → Critical Scaling → Job Mastery
The idea is to turn your basic attacks into increasingly efficient precision tools. Instead of relying on a huge number of weak projectiles, you’re investing in quality and scaling.
This build feels especially good once critical effects and penetration begin stacking together.
The Alchemical Approach
The alchemy-focused route is a completely different experience.
Here, you’re building around the relationship between your combat abilities and potion-related bonuses. The interesting part is that your progression isn’t entirely about making the arrow itself stronger.
You’re making the entire system around the arrow stronger.
For players who enjoy complicated builds and watching several mechanics interact, I honestly find this route more interesting.
Don’t Hybridize Too Early
This is probably my biggest recommendation for new players.
Don’t try to become everything at once.
It’s tempting to take a few sniper nodes, then grab some alchemy upgrades, then invest in gathering, then jump back into another combat branch because everything looks useful.
Technically, all of those upgrades may be good.
Together, they can still make a mediocre build.
The reason is simple: specialization allows your multipliers to reinforce each other. When you’re spreading points across unrelated branches, you’re sacrificing the opportunity to reach the stronger nodes deeper in your chosen path.
I would rather have one very good build than five half-developed ones.
Once your primary Job branch has reached its important mastery or capstone area, that’s when I would start looking at secondary utility.
Mid-Game: Think in Multipliers, Not Numbers
This is where Zad Archery gets much more interesting from an optimization perspective.
Early game is about survival and automation.
Mid-game is about multiplication.
If you see two upgrades and one gives you a straightforward increase while another improves attack speed, critical scaling, cooldowns, or the effectiveness of another mechanic, don’t automatically choose the larger-looking number.
Ask yourself:
“What will this upgrade multiply later?”
That’s the question I keep coming back to.
An attack-speed improvement can affect the value of several other mechanics. A cooldown reduction can increase how frequently your strongest ability contributes damage. A crafting bonus can eventually translate into better equipment, which then improves combat.
This is why skill tree optimization in Zad Archery feels more rewarding than simply following a linear upgrade path.
Late Game: Shaping and Masteries Become the Real Game
Once you reach the later stages of progression, basic stats start losing some of their magic.
At this point, I become much more interested in Shaping, Masteries, and Guardian Perks.
These systems can fundamentally alter how your build behaves.
Instead of simply increasing damage, some upgrades change what an ability actually does or create new interactions between combat and your other progression systems.
And honestly, this is where I think Zad Archery shines.
There’s something much more satisfying about unlocking an upgrade that changes the behavior of an ability than buying another generic “+10% damage” node.
The best late-game skill tree decisions are therefore often about transformation rather than accumulation.
Guardian Perks: Match Your Build to Your Bonuses
Guardian Perks are another reason why I don’t think there’s one permanent “best build.”
Your optimal skill tree can change depending on what your current Guardian setup is encouraging.
If your Guardian bonuses are heavily focused on crafting and passive resource generation, for example, it can make sense to temporarily emphasize those areas of the tree.
If you’re preparing for a difficult combat push, you may want to shift back toward offensive scaling.
That’s why I recommend treating the skill tree as something you optimize around your current progression, rather than a sacred build that can never be changed.
The best build is often the one that takes advantage of what the rest of your account is already doing.
My Recommended Progression Route
If I were starting a completely fresh character today, this is the general path I’d follow:
Points 1–5
Start with Base Arrow Damage and Arrowfall improvements.
The goal isn’t to create the ultimate build yet. It’s simply to make the opening waves fast and painless.
Points 6–12
Move toward the central utility path and work toward the Jobs system.
Avoid wasting points on random side branches just because they’re nearby.
Points 13–25
Finish the important Living Aim progression and begin opening up Mining and Herbing.
This is where your character starts becoming more than just a damage dealer.
Points 26–50
Pick your primary Job and commit.
Whether you’re going for precision/sniper scaling or an alchemy-heavy setup, stay focused until you reach the major mastery portion of the branch.
Points 51–75
Start connecting your combat build with Shaping and Masteries.
This is the stage where I would begin experimenting more aggressively.
Point 76+
Clean up utility, Guardian synergy, alchemy bonuses, and any remaining automation upgrades.
At this point, you should have enough of your core engine running that small optimizations can produce surprisingly large improvements.
Zad Archery Beginner Guide: Best Tips, Tricks, and Progression Strategy (2026)
The Biggest Mistakes I Would Avoid
After looking at the progression from an optimization perspective, there are a few traps that seem particularly easy to fall into.
- Buying damage forever — Damage is useful, but it isn’t automatically the best upgrade.
- Ignoring gathering — Mining and Herbing may look like side content early on, but they can become important parts of your progression economy.
- Splitting between Jobs — A little bit of everything sounds safe. Usually, it just delays your strongest bonuses.
- Ignoring cooldowns — Attack speed and cooldown improvements can have a much bigger impact than their descriptions initially suggest.
- Refusing to adapt — If your Guardian Perks, gear, or crafting progression changes, your optimal skill tree can change with them.
Final Thoughts: Is There Really One Perfect Zad Archery Build?
After playing around with the systems, I don’t think there is one universal skill tree that everyone should blindly copy.
And honestly, I’m glad.
The fun part of Zad Archery is finding the point where the different systems start feeding each other. You begin with a simple bow and a handful of upgrades, and eventually you’re dealing with Jobs, automated attacks, gathering, crafting, alchemy, Shaping, Masteries, and Guardian effects all at the same time.
For pure efficiency, I’d still recommend the same philosophy:
Automate early. Specialize in the mid-game. Chase multipliers. Connect your professions to combat. Adapt your late-game build around Shaping and Guardian bonuses.
Most importantly, don’t be afraid to experiment.
I’m usually skeptical when an incremental game throws a massive skill tree at me because a lot of them use size as a substitute for depth. Zad Archery feels different when you start understanding its progression loops. The tree isn’t interesting because it’s huge; it’s interesting because the right choices can make the entire machine run differently.
And that’s exactly the kind of progression system that keeps me playing “just one more wave” long after I originally planned to log off.
If you’re chasing fast progression, efficient builds, or simply want to see how ridiculous your archer can eventually become, the skill tree is where I’d spend most of my attention.
Build smart, keep your crafting moving, and don’t underestimate the boring-looking nodes. Sometimes the upgrade that looks weakest is the one that makes your entire build work.