Onimusha Way of the Sword Best Charms Combination Guide (2026)
Onimusha: Way of the Sword does something that a lot of modern action games seem increasingly afraid to do: it makes you earn every clean hit. Combat is deliberate, aggressive and, at times, downright cruel. Playing as Miyamoto Musashi, you are not simply mowing through Genma with endless combo strings. You are watching animations, reading attacks, looking for tiny openings and waiting for that satisfying moment when a perfectly timed counter turns an enemy’s confidence into a pile of red mist.
That is where the Charm system becomes much more important than it first appears. These passive bonuses are easy to overlook during the early hours, but the right combination can completely change how Musashi performs. A damage-focused setup can turn successful parries into devastating follow-up attacks, while a defensive build can give you enough breathing room to survive bosses that would otherwise chew through your healing items.
After spending serious time looking at how the different bonuses fit into the game’s combat loop, I would not recommend simply equipping whichever Charm has the highest-looking number. Synergy matters far more. Way of the Sword rewards players who build around their strengths instead of trying to make Musashi equally good at everything.
This guide breaks down the best Charm combinations for damage, survivability, parrying, resource generation and Blazing State builds, along with practical advice on when each setup actually makes sense.
How the Charm System Works in Onimusha: Way of the Sword
Charms function as passive modifiers that sit alongside Musashi’s weapons, Oni Armaments and other equipment. They do not replace the core combat mechanics, but they can make certain mechanics noticeably more rewarding. If you are already good at parrying, for example, a Charm that rewards successful counters can turn that skill into a huge damage advantage.
Equipping and Changing Charms
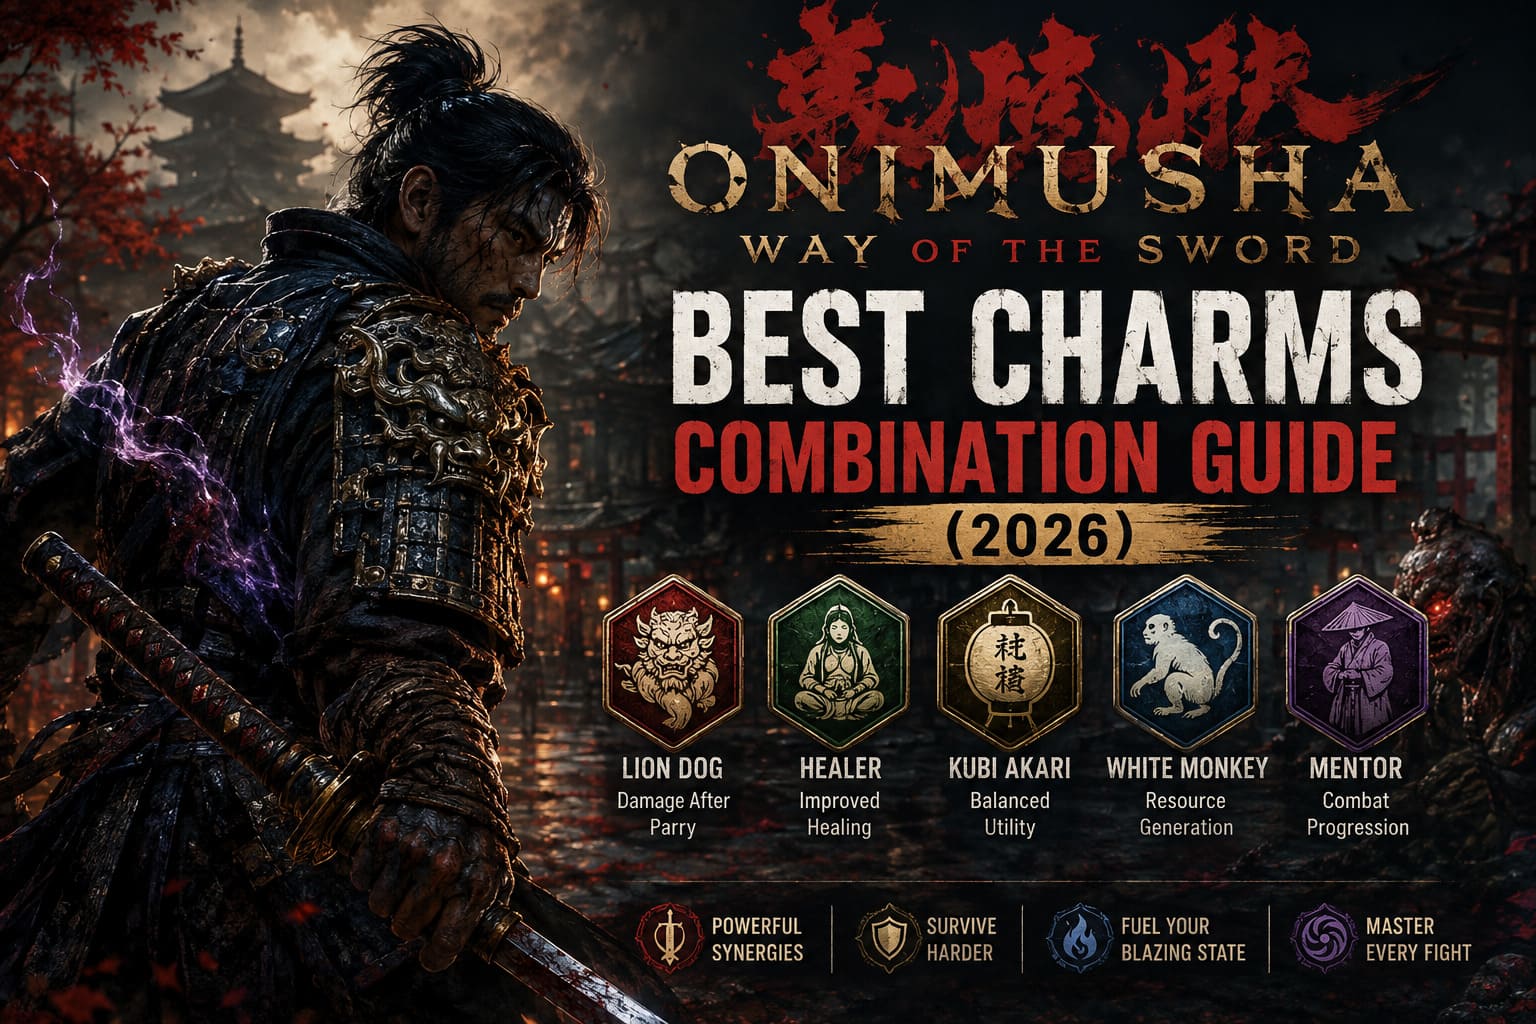
Changing your Charms is handled through the Equipment section of the pause menu. The system is thankfully straightforward, which is exactly what I want from a game like this. There is no reason to bury passive equipment behind some unnecessarily complicated crafting screen.
There are restrictions around certain safe areas and interactions, though, so don’t expect to completely rebuild Musashi’s setup in the middle of every activity. The important thing is to get into the habit of checking your loadout before major encounters. Once you understand which Charm combination fits the situation, switching builds becomes part of the strategy rather than an afterthought.
Unlocking More Charm Slots
Musashi does not start the game with enough capacity to stack several passive bonuses. Your initial setup is limited, which makes early Charm choices fairly simple. The real fun begins when you unlock the second Charm slot.
Power Stones are particularly important here. These can be discovered throughout Kyoto and obtained through activities such as Kyoto Mysteries and Side Stories. Investing enough into the relevant skill progression eventually gives Musashi access to another passive Charm slot.
If you are planning a serious build, unlocking that second slot should be one of your early priorities. A single Charm can help, but two complementary bonuses are where the system really starts showing its teeth.
Upgrading Your Charms
Finding a useful Charm is only the beginning. Charms can be improved using Red Souls, giving their effects stronger values as they are upgraded.
Enma’s Hall is your destination for this process. I strongly recommend investing in your most frequently used Charms instead of spreading your resources across everything immediately. There is little value in having six mediocre passive effects when two properly upgraded Charms can directly support the way you actually play.
| Charm | Main Strength | Best For | Build Role |
|---|---|---|---|
| Lion Dog Lovable Charm | Follow-up attack damage | Parry-focused players | Offensive |
| Charm of the Healer | Improved healing | Boss fights and learning encounters | Defensive |
| Kubi Akari Charm | Balanced combat utility | General combat | Hybrid |
| White Monkey Charm | Agility and resource generation | Oni Armament users | Utility |
| Mentor Charm | Combat progression benefits | General progression | Utility |
The Best Charms Worth Building Around
Lion Dog Lovable Charm
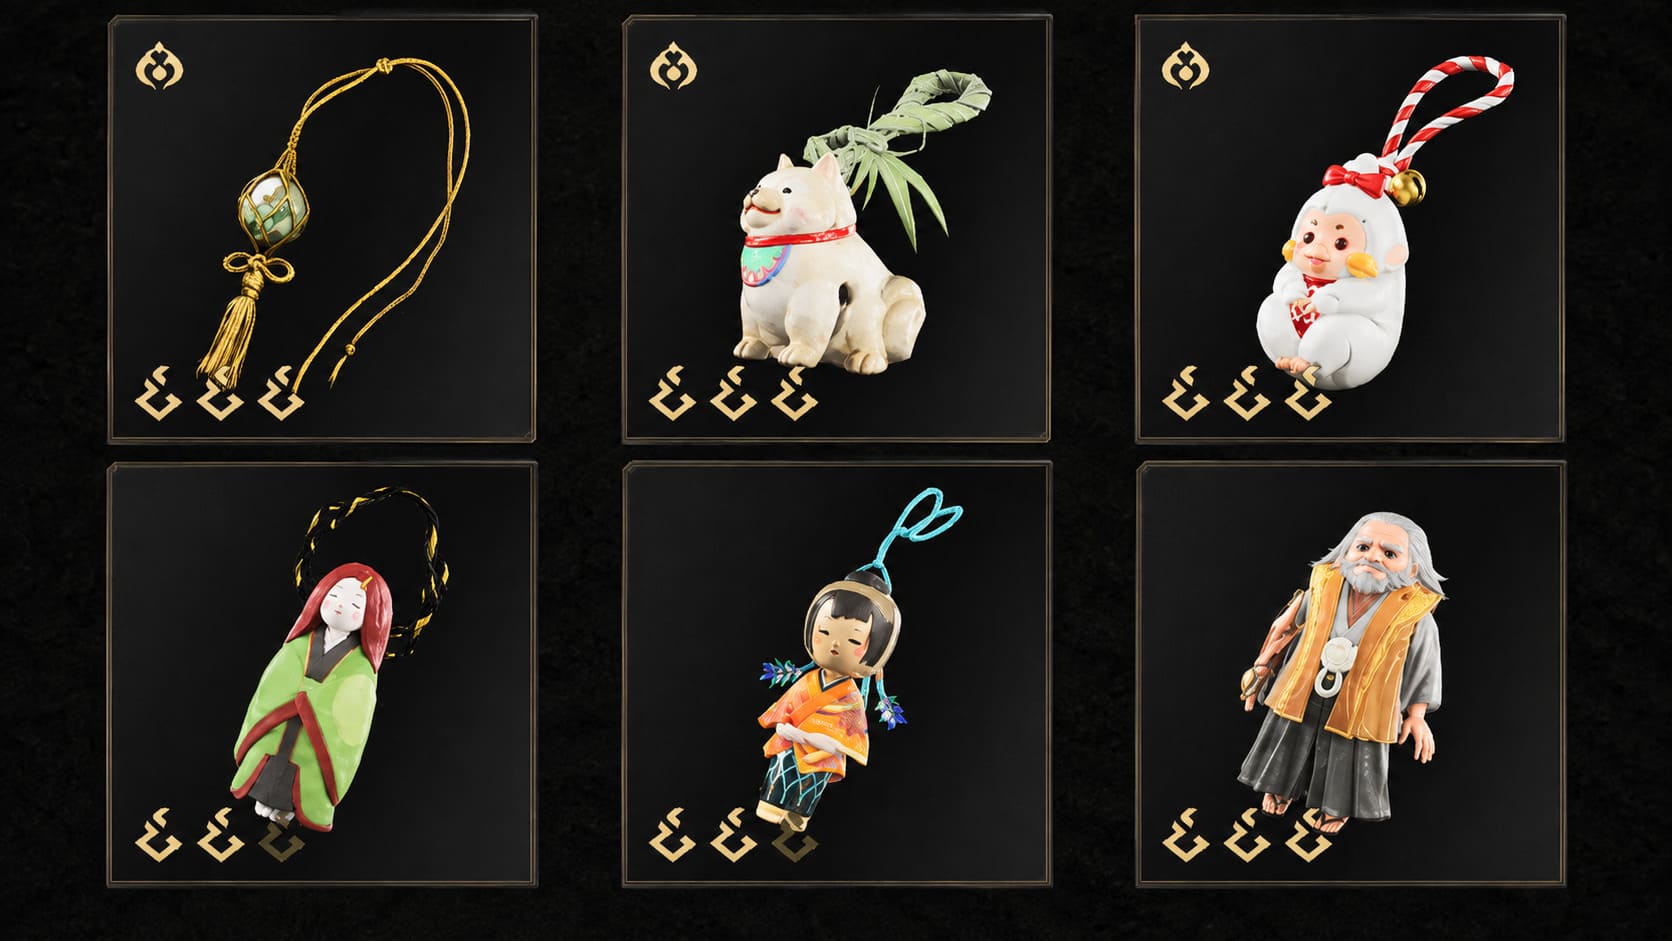
If your timing is good, Lion Dog Lovable Charm is one of the first pieces I would build around. Its appeal is simple: it rewards you for doing exactly what Way of the Sword wants you to do.
The Charm increases the damage of attacks performed immediately after a successful perfect parry or Reflex Dodge. At Level 1, the bonus reaches around 25%, with higher upgrades pushing the effect significantly further.
That sounds good on paper. In actual combat, it feels even better because the bonus naturally fits into Musashi’s rhythm. You defend correctly, create the opening and immediately punish the enemy. No weird setup. No ten-second buff rotation. Just good swordplay turning into more damage.
There is one catch: the Charm is only as useful as your timing. If you panic-roll through every attack and rarely land clean counters, another passive may provide more value.
Charm of the Healer
Charm of the Healer is the safety blanket of the Charm system, and there is absolutely nothing wrong with using one. Not every player needs to chase maximum DPS.
The Charm improves the amount of health restored through healing sources, including consumables and Yellow Souls. Its base bonus is modest, but the effect becomes increasingly valuable during long encounters where every recovered chunk of health matters.
I particularly like this Charm for players still learning boss patterns. Way of the Sword can punish one mistake extremely hard, and sometimes the difference between winning and restarting a fight is simply having enough recovery left to survive the final phase.
Kubi Akari Charm
The Kubi Akari Charm is a more flexible option. Rather than being built entirely around one narrow mechanic, it offers a useful collection of performance benefits that work well across regular exploration and combat.
That makes it a solid secondary Charm when you don’t want your entire build tied to a single gimmick. It is especially attractive when you are still experimenting with weapons, Oni Armaments and different combat approaches.
White Monkey Charm
White Monkey Charm leans heavily into mobility and resource generation. For players who enjoy making frequent use of special abilities and Oni Armaments, this can be a surprisingly strong choice.
It is not as immediately satisfying as seeing a huge damage number after a parry, but faster resource generation has a compounding effect during longer fights. More resources mean more abilities. More abilities mean more opportunities to pressure enemies and force openings.
Mentor, Oni Lady and Little Dancer Charms
The Deluxe and Premium Deluxe editions also introduce several specialized Charms, including Mentor, Oni Lady and Little Dancer. These are more niche and should not automatically replace the core options above.
The Mentor Charm is particularly interesting as a secondary utility option, while Oni Lady and Little Dancer can make sense when your preferred weapon and combat loop line up with their bonuses.
Best Charm Combinations in Onimusha: Way of the Sword
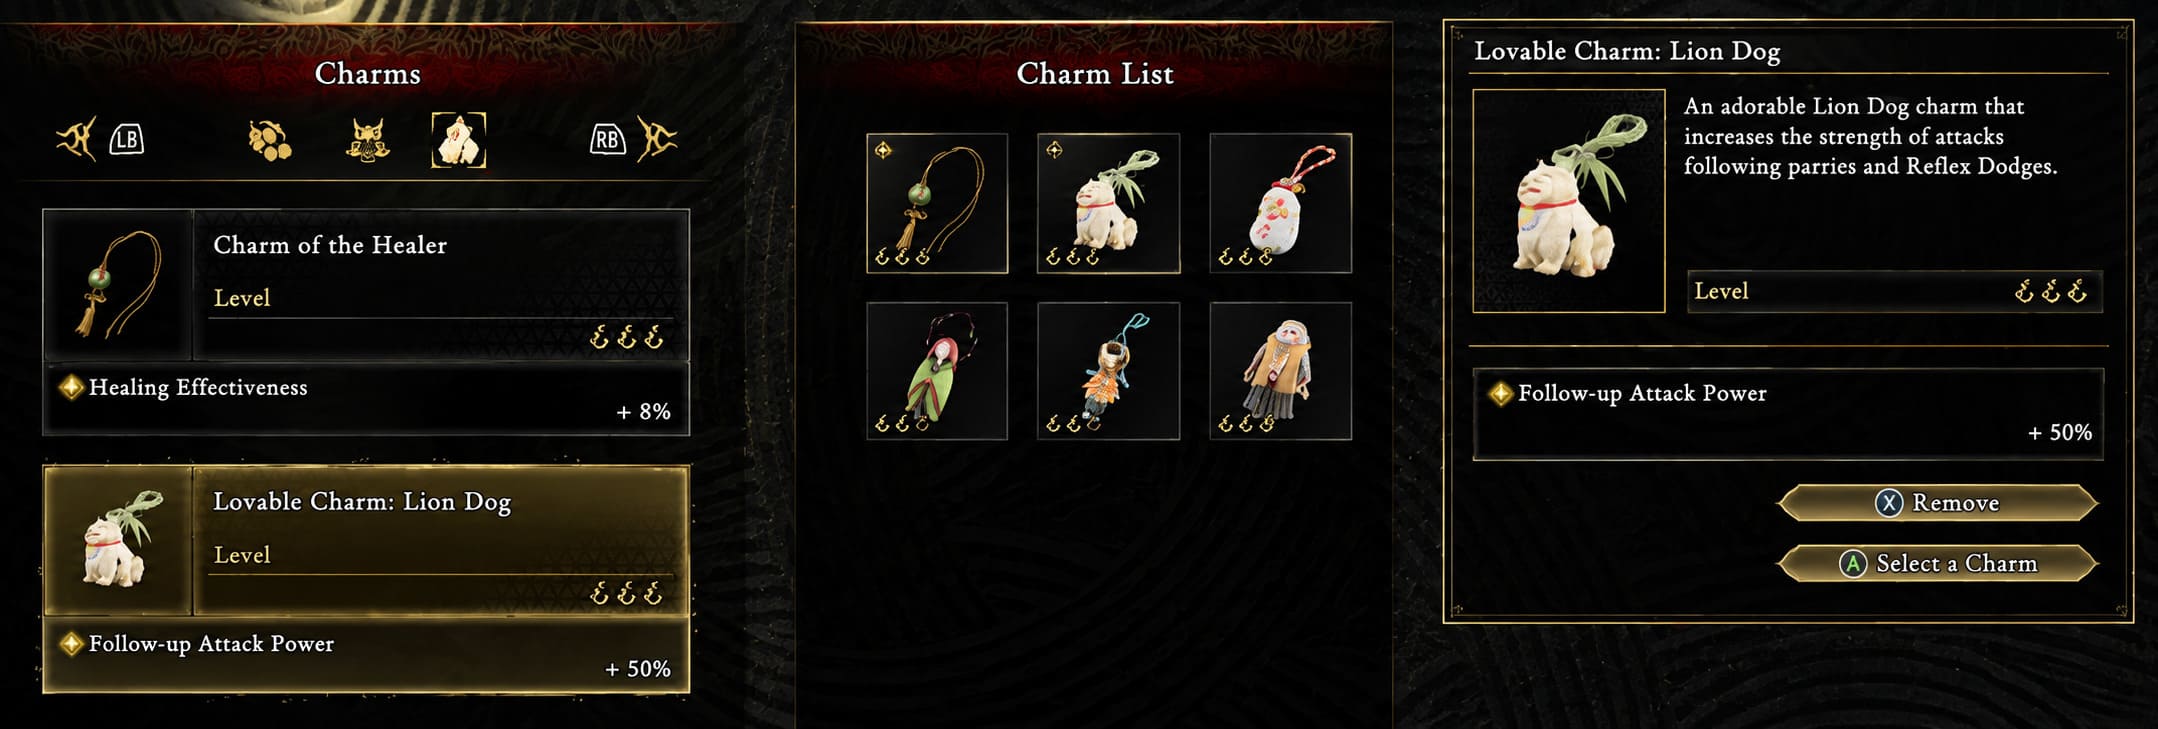
1. Parry Master Build – Lion Dog + Mentor
Best for: Experienced players, parry specialists, speedrunners and anyone who enjoys playing aggressively.
Recommended combination: Lion Dog Lovable Charm + Mentor Charm
This is the build I would recommend first to anyone who has genuinely mastered Musashi’s defensive timing. The Lion Dog Charm is the star of the show because every successful parry or Reflex Dodge creates an opportunity for a boosted counterattack.
Way of the Sword’s combat system is built around these moments. You watch the enemy’s movement, wait instead of swinging wildly, then answer at precisely the right time. With Lion Dog equipped, that answer hits considerably harder.
The Mentor Charm works well as a secondary option because it adds utility without forcing you to abandon the aggressive playstyle. Kubi Akari can also fill this second slot if you prefer a more general-purpose setup.
My verdict: If you can consistently land perfect counters, this is one of the most satisfying builds in the entire game. It turns defensive skill into offensive momentum.
2. Undying Samurai Build – Healer + Lion Dog
Best for: New players, defensive players and anyone struggling with late-game bosses.
Recommended combination: Charm of the Healer + Lion Dog Lovable Charm
This is the build I would use when learning a difficult boss rather than trying to set a speedrun record. The Healer Charm gives you more value from your recovery tools, while Lion Dog still rewards you when you successfully read an attack.
The combination is surprisingly forgiving. You get defensive insurance without turning Musashi into a complete turtle.
There is also a psychological advantage here. When you know your healing is more effective, you are less likely to panic because of a single mistake. That makes it easier to concentrate on boss animations and learn the timing needed for future attempts.
If you prefer resource generation over counter damage, White Monkey is another strong partner for the Healer Charm.
3. Blazing State Build – Kubi Akari + White Monkey
Best for: Players who rely heavily on Oni Armaments, special abilities and resource-driven combat.
Recommended combination: Kubi Akari Charm + White Monkey Charm
This is the setup for players who want to keep Musashi’s combat engine running hot. Instead of focusing purely on the damage of one counterattack, the goal is to generate resources quickly and reach powerful combat states more frequently.
The Blazing State is especially important here. Consecutive successful defensive actions help build momentum, and once Musashi reaches this powered-up state, his attacks become much more threatening while his ability to pressure enemy defenses improves.
White Monkey fits perfectly into this approach because faster resource generation gives you more opportunities to activate your stronger abilities. Kubi Akari then provides the flexible secondary support needed to keep the build useful outside of one specific encounter.
This setup becomes particularly nasty against enemies with large stamina or posture pools. Instead of slowly chipping away at their defenses, you are constantly pushing toward another burst of pressure.
How to Get More Value From Your Charm Setup
There are a few habits that will make your Charm builds much more effective, regardless of which combination you choose.
- Upgrade your best Charms early. Do not automatically hoard every Red Soul you find. Stronger passive effects can make your entire campaign easier.
- Build around your actual skill level. A theoretical DPS build is worthless if you cannot consistently land the actions required to activate it.
- Use enemy body-part targeting. During vulnerable states and Break Issen opportunities, targeting specific body parts can produce additional resources and rewards.
- Change your build before major encounters. Exploration and boss fights do not always demand the same setup, so there is little reason to stubbornly use one Charm combination everywhere.
Don’t Waste Red Souls Just Because You Can
Resource management matters more than it initially seems. Red Souls have several potential uses, and it can be tempting to save everything for future purchases or upgrades.
Personally, I would rather have a properly upgraded Charm helping me through the next ten hours than a giant pile of currency sitting untouched in my inventory. The benefits compound over time. A stronger healing effect can save consumables. A stronger counter bonus can shorten fights. Faster resource generation can give you more opportunities to use powerful abilities.
That said, you should still avoid blindly maxing every Charm you discover. Pick the two or three that actually fit your preferred playstyle and put your resources behind those first.
Onimusha Way of the Sword: Best Leather and Iron Farming Locations Guide
Which Charm Build Should You Use?
| Playstyle | Primary Charm | Secondary Charm | Why It Works |
|---|---|---|---|
| Perfect Parries | Lion Dog | Mentor | Turns successful counters into heavy follow-up damage |
| Boss Learning | Charm of the Healer | Lion Dog | Better recovery with a strong counterattack bonus |
| Resource Heavy | White Monkey | Kubi Akari | Faster resource generation and flexible utility |
| General Exploration | Kubi Akari | White Monkey | Reliable performance across mixed encounters |
| Aggressive Combat | Lion Dog | Kubi Akari | Strong punishment with useful secondary bonuses |
Onimusha Way of the Sword Secret Boss Guide: How to Unlock and Beat Byakue
Final Thoughts on the Best Onimusha: Way of the Sword Charms
The Charm system is one of those mechanics that becomes much more interesting once you stop treating it as a collection of random stat bonuses. The best builds are not necessarily the ones with the biggest individual numbers. They are the ones that fit the combat loop you are already good at.
For most aggressive players, Lion Dog Lovable Charm is the obvious starting point. It rewards the core skill that Way of the Sword demands most: timing. If you are still learning the game’s bosses, pairing it with the Charm of the Healer gives you a much more forgiving experience without sacrificing all offensive potential.
Players who prefer Oni Armaments and resource-heavy combat should look toward White Monkey and Kubi Akari. That combination is less flashy on paper but can become extremely effective when you are constantly cycling abilities and building toward powerful combat states.
Most importantly, don’t feel pressured to copy someone else’s build just because it is labelled “meta.” The beauty of this system is that it lets your combat habits matter. If you are the kind of player who lives for perfect parries, build around them. If you are still getting smacked by boss attacks, take the healing boost. If you love watching every combat resource meter climb and then dumping everything into an Oni Armament, build for that.
Unlock the second Charm slot as early as practical, upgrade the pieces you actually use, and change your setup when the situation demands it. Once those habits become second nature, Musashi stops feeling like a samurai constantly fighting for survival and starts feeling like the monster on the other side of the blade.