Subnautica 2 Dive Elevator: Build Guide and Survival Strategies
If you’ve spent as many hours as I have drowning (sometimes literally) in survival-crafting games, you start to recognize when a mechanic isn’t just “new,” but transformational.
The Dive Elevator in Subnautica 2 falls squarely into that category.
This isn’t just another base module or transport gimmick—it feels like the developers finally asked: “What if vertical movement in Subnautica wasn’t a chore, but the backbone of gameplay?”
And honestly, as someone who lives for these underwater survival loops, I think they nailed the idea… with a few rough edges worth talking about.
Let’s break it down like a player who’s actually been down there grinding resources, not just reading patch notes.
The Kharaa Bacterium in Subnautica 2: Is the Plague Truly Gone?
What the Dive Elevator Actually Changes
At first glance, the Dive Elevator sounds simple: a fast vertical transport system between surface and deep ocean bases. But in practice, it completely reshapes how you think about movement, logistics, and even risk management.
Instead of slow swimming, Seaglide spam, or vehicle dependency, you now have a centralized vertical highway that does three things at once:
- Moves players rapidly between depths
- Transports resources like a cargo lift
- Creates a tactical return point in dangerous zones
In older Subnautica-style gameplay, going deep meant committing time and resources. Now you can dip into abyssal zones, grab materials, and be back at your base in seconds if things go wrong.
And trust me—they will go wrong.
Core Dive Elevator Mechanics (What It Feels Like In-Game)
From a gameplay perspective, the Dive Elevator is more than a platform. It’s a tethered, motorized system that acts like a hybrid between a transport cable and a mobile base extension.

What stands out most:
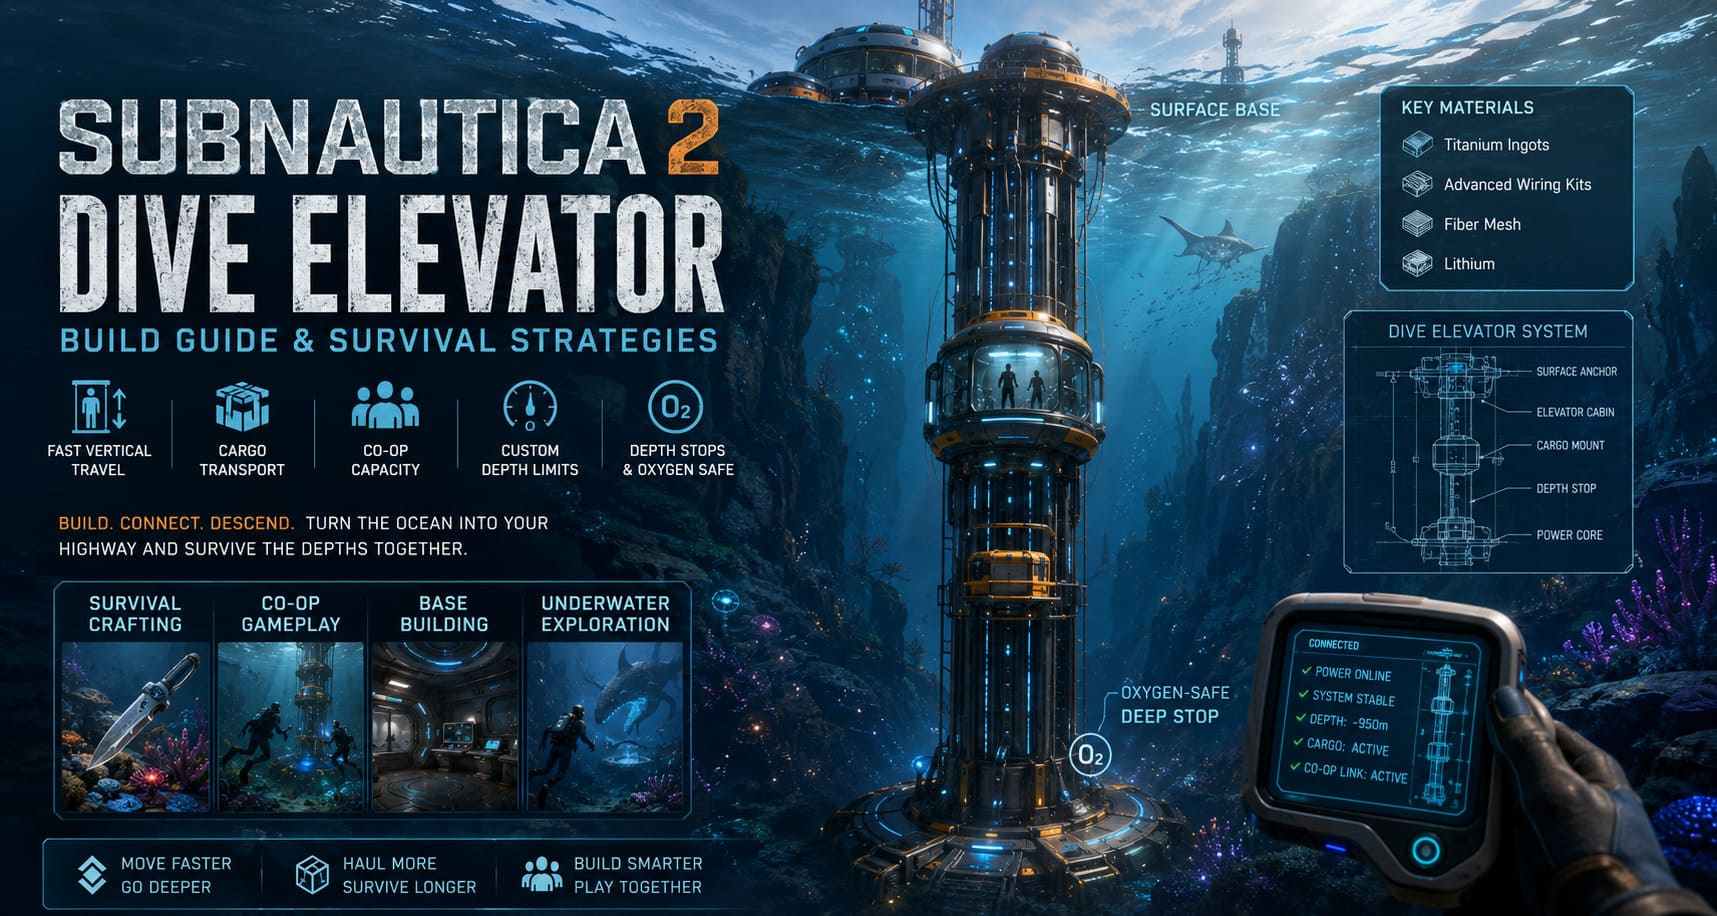
- High-speed vertical travel faster than Seaglide ascent
- Cargo attachment system for resource hauling
- Multi-player capacity for co-op gameplay
- Depth customization for travel limits
- Oxygen-safe landing zones at deeper stops
The first time I used it, it honestly felt like switching from climbing stairs to using an elevator in real life. You don’t realize how much time you wasted before until it’s gone.
Leaving 4546B Behind: Why Subnautica 2’s New Setting Works
But here’s the thing: it’s not just convenience. It changes risk behavior. You start diving deeper because retreat is easier. That alone alters the entire game loop.
Dive Elevator Build Requirements (Practical Player Breakdown)
You’ll need mid-to-high tier resources before you can even think about building one. The game pushes you slightly before you’re ready, which actually works in its favor.
Key Materials You’ll Need
- Titanium Ingots
- Advanced Wiring Kits
- Fiber Mesh
- Lithium
Nothing here is shocking for Subnautica veterans, but the quantity and integration into structural systems is what makes it interesting.
Unlike older base pieces, the Dive Elevator feels like a mini engineering project, not just a snap-together module.
Step-by-Step Build Strategy (How I Built Mine Without Regrets)
1. Pick a Smart Location
Don’t just place it anywhere. That’s a rookie mistake. Best placement zones are cliff drops into deep biomes, transition zones between safe waters and predator-heavy areas, or near resource-rich trenches. If you place it wrong, you’ll either waste travel efficiency or constantly run into terrain issues.
2. Anchor the System
You need a solid base foundation or winch point. Think of it like building a railway station—you don’t move that later.
3. Set Depth Carefully
You define how deep the elevator goes. Too shallow and it becomes useless. Too deep early game and you’re basically inviting death. Start moderate, then extend once you understand biome danger levels and resource routes.
4. Add Oxygen Support
This is where the system becomes genuinely powerful. The elevator can create temporary safe breathing zones at depth stops, enabling longer mining runs and safer co-op operations without constant vehicle reliance.
Co-op Gameplay: Where the Elevator Actually Shines
Single-player use is good. Co-op is where it becomes ridiculous in the best way.
The gameplay loop quickly evolves into a logistics system:
- One player mines deep resources
- One manages the surface base
- The elevator shuttles cargo continuously
It transforms Subnautica into a survival logistics simulation. In emergencies, it becomes a rescue system. If a teammate is chased by a deep-sea predator, calling the elevator is often faster than any escape vehicle.

Advanced Player Strategies (What I Wish I Knew Earlier)
Use It as a Navigation Anchor
The elevator becomes a permanent beacon in the ocean. You will never get lost again.
Turn It Into a Resource Pipeline
Instead of manual trips, treat it as a supply chain system between depths and surface operations.
Combine With Vehicles Smartly
Vehicles remain useful for horizontal exploration, while the elevator dominates vertical movement.
Always Manage Power Properly
If your base loses power, the elevator becomes unreliable. Always pair deep installations with stable power sources.
Quick Overview Table
| Tag | Focus |
|---|---|
| Survival Crafting | Core gameplay loop |
| Co-op Gameplay | Multiplayer logistics |
| Base Building | Structural integration |
| Underwater Exploration | Deep biome traversal |
Final Thoughts
The Dive Elevator in Subnautica 2 is more than a feature—it’s a design philosophy shift. It turns vertical space into infrastructure rather than limitation.
Once you build your first proper system, you stop thinking of the ocean as a flat survival map and start seeing it as a layered world of movement and logistics.
If you’re going to master Subnautica 2, don’t treat the elevator as optional. Treat it like your spine.