Blood of Dawnwalker Armourer Locations: Complete Armor Upgrade & Skill Manual Guide
If you are playing The Blood of Dawnwalker the way I did—checking every corner, grabbing every useful item, and inevitably becoming overburdened with junk—you quickly realize that armor is not something you can afford to ignore. The enemies hit hard, the tougher encounters punish sloppy builds, and walking into a dangerous area with outdated defensive gear is basically asking for trouble.
That is where Armourers become incredibly important.
These vendors are not just convenient NPCs standing around waiting for you to spend Denarii. Armourers handle your armor upgrades, sell valuable armor-related gear, and, most importantly, offer Skill Manuals that unlock permanent passive bonuses. Some of these manuals can have a much bigger impact on your character than another few points of armor on a piece of equipment that you might replace an hour later.
There are four Armourers in The Blood of Dawnwalker, and finding all of them is worth the effort. The annoying part? Three of them are daytime-only vendors. If you arrive at the wrong time, you can waste an entire trip wondering where the NPC went.
I’ve put together this guide to make the process painless. Here is where to find every Armourer, what each one sells, when they are available, and how I recommend spending your Denarii.
Why Armourers Matter So Much
Armourers are marked on the map with a white armor icon, making them relatively easy to recognize once you know what you’re looking for.
Their primary job is upgrading your existing armor. Every armor piece has its own level, and taking it to an Armourer lets you increase its effectiveness. Better armor means stronger protection, and depending on your build, those improvements can make a noticeable difference when fighting powerful enemies.
The catch is the price.
Armor upgrades consume Denarii, and the cost increases as you push equipment toward higher levels. Early upgrades are fairly affordable, but upgrading an expensive piece repeatedly can burn through your savings surprisingly quickly.
This is why I wouldn’t recommend blindly upgrading every piece of armor you find.
You will replace equipment throughout the game. A chest piece that feels amazing early on can become obsolete once you discover a stronger set through exploration, quests, or tougher encounters. Permanent passive abilities from Skill Manuals, on the other hand, stay with your character.
That makes your Denarii management surprisingly important.
| Armourer | Location | Availability | Skill Manuals |
|---|---|---|---|
| Armourer #1 | Maragir | Day Only | Pack Mule, Second Skin I |
| Armourer #2 | Svartrau City, Southwest | Day & Night | Second Skin II |
| Armourer #3 | Svartrau Marketplace | Day Only | Second Skin I, Second Skin II |
| Armourer #4 | Tantari | Day Only | Second Skin II, Walking Fortress |
Armourer #1 — Maragir
Location: Maragir
Availability: Daytime Only
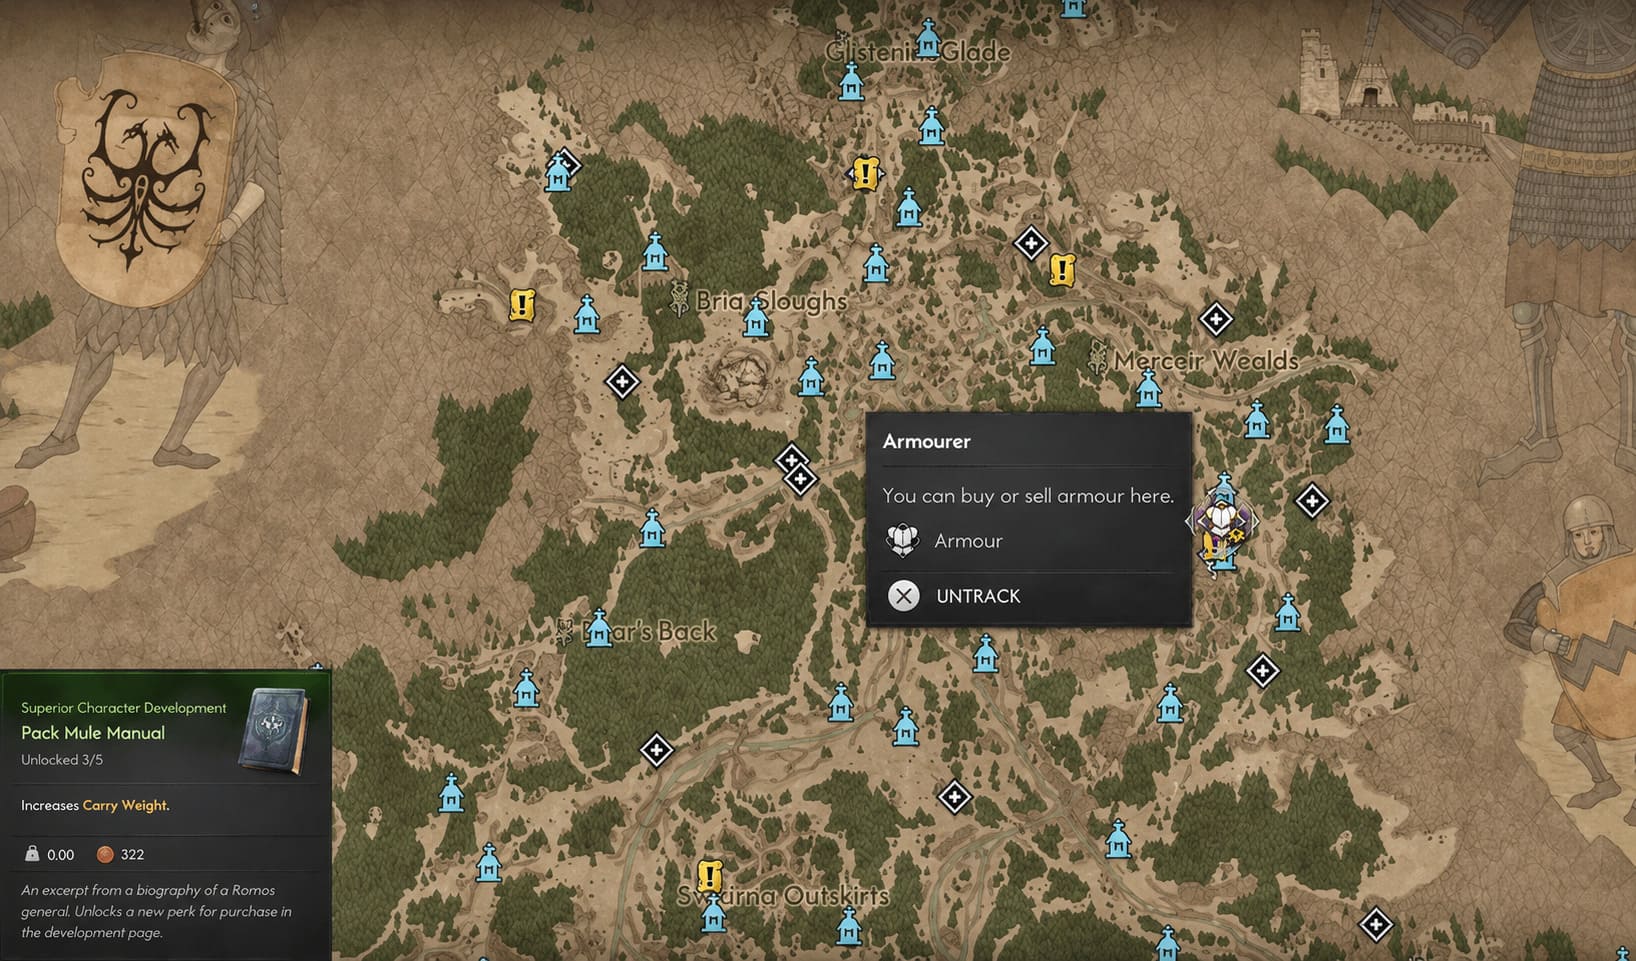
Maragir is one of the first major locations where you’ll have a realistic opportunity to start investing in your defensive setup. That makes its Armourer particularly useful during the early stages of the game.
There is one thing you absolutely need to remember: this Armourer is not available at night.
If you reach Maragir after dark and can’t find the vendor, don’t immediately assume you’ve missed a quest or triggered some strange NPC bug. Check the time first. The Armourer’s stall can be locked or empty during nighttime, and the corresponding armor marker may no longer be useful.
The simple solution is to find a nearby campfire, tavern, or another suitable resting location and advance the clock until morning.
What Does the Maragir Armourer Sell?
This Armourer offers two important Skill Manuals:
- Pack Mule Manual
- Second Skin I Manual
The Pack Mule Manual is one of those upgrades that sounds simple until you actually have it. If you constantly fill your inventory while exploring, this passive can save you a ridiculous amount of hassle.
Anyone who likes looting everything that isn’t nailed down will appreciate it.
Weapons, crafting materials, miscellaneous items and other loot can pile up quickly, and increased carrying capacity means fewer interruptions to your exploration. Instead of returning to town every few minutes because your character is stuffed like a backpack with legs, you can stay out longer.
Then there’s Second Skin I, the first step in an important defensive skill line. It improves the effectiveness of your armor and gives you a stronger defensive foundation during the early game.
Personally, I’d prioritize these permanent bonuses before going crazy with armor upgrades.
Armourer #2 — Svartrau City Southwest
Location: Southwest corner of Svartrau City
Availability: Day & Night
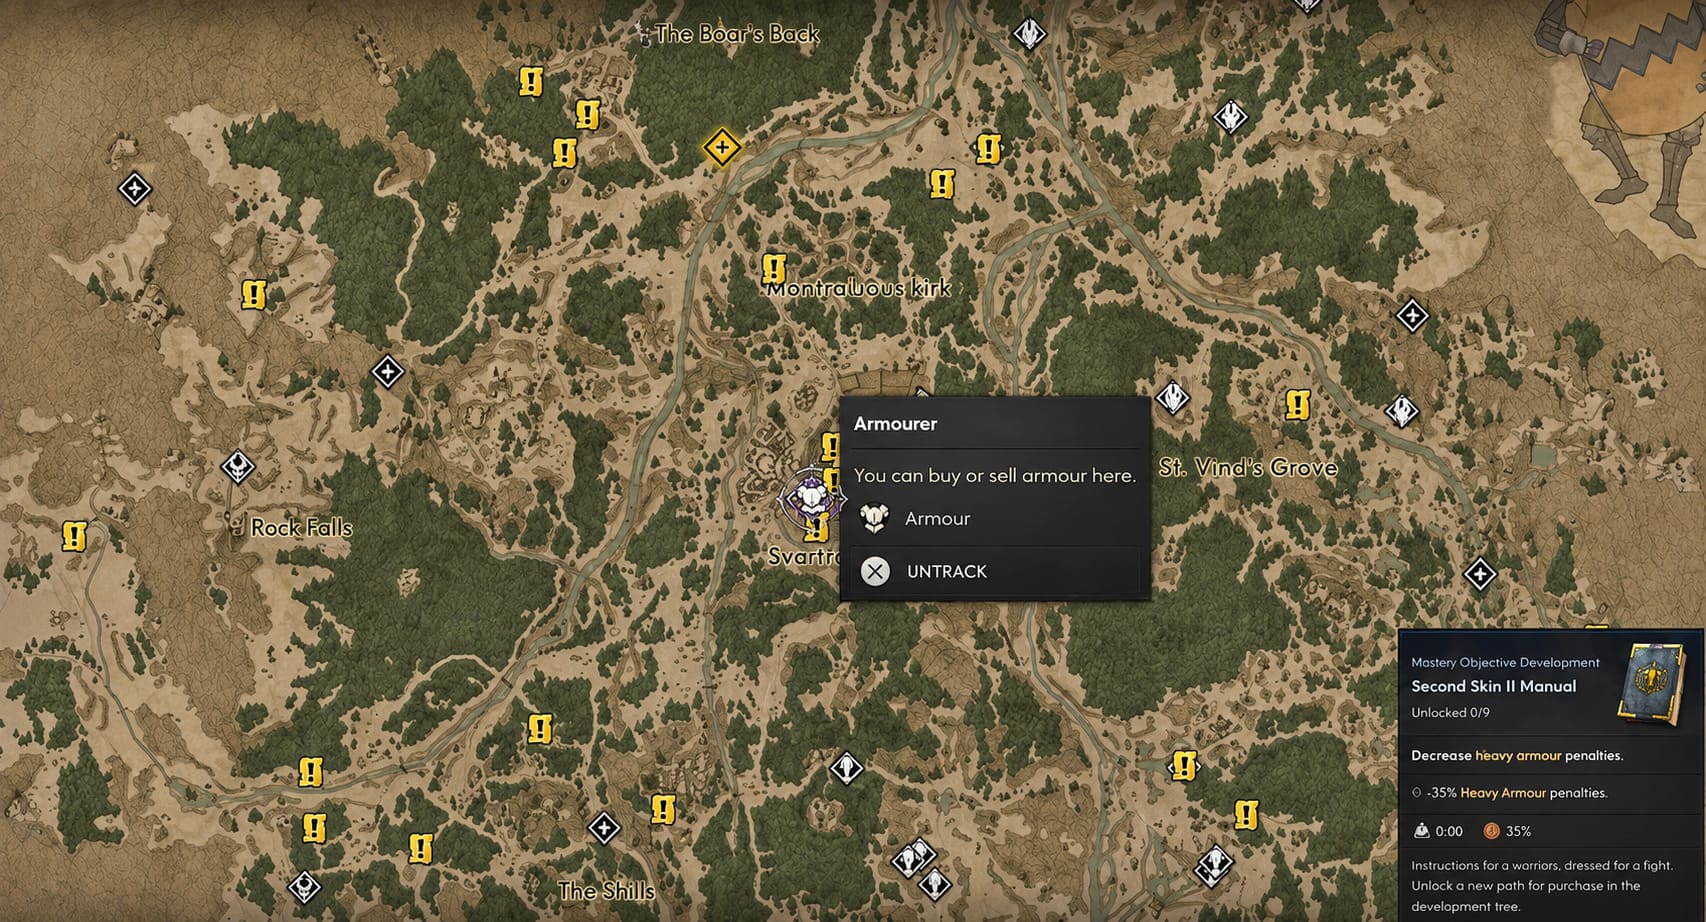
This Armourer is particularly useful because he is the exception to the game’s annoying schedule.
Unlike the other three Armourers, this vendor is available both during the day and at night.
That makes him a fantastic emergency stop when you’ve just finished a long night of questing and realize your armor could use some attention.
Finding him is mostly a matter of checking the extreme southwestern part of Svartrau City. Svartrau itself can be a maze, with its streets, buildings, different elevations and various NPCs competing for your attention, so don’t be surprised if you need to check the map carefully.
Skill Manual: Second Skin II
The big reason to visit this Armourer is the Second Skin II Manual.
This is the next stage of the Second Skin progression and gives you a stronger defensive passive than the first tier.
If you’ve already purchased Second Skin I in Maragir, this is the natural follow-up. If you’ve somehow reached Svartrau without dealing with the earlier Armourer, I’d still make a note to return to Maragir and grab the first tier when possible.
The important lesson here is simple: don’t confuse upgrading armor with upgrading your character.
A better chest piece is temporary. A permanent skill progression is something you’ll benefit from for the rest of the game.
Armourer #3 — Svartrau Marketplace
Location: Marketplace, inside the central house
Availability: Daytime Only
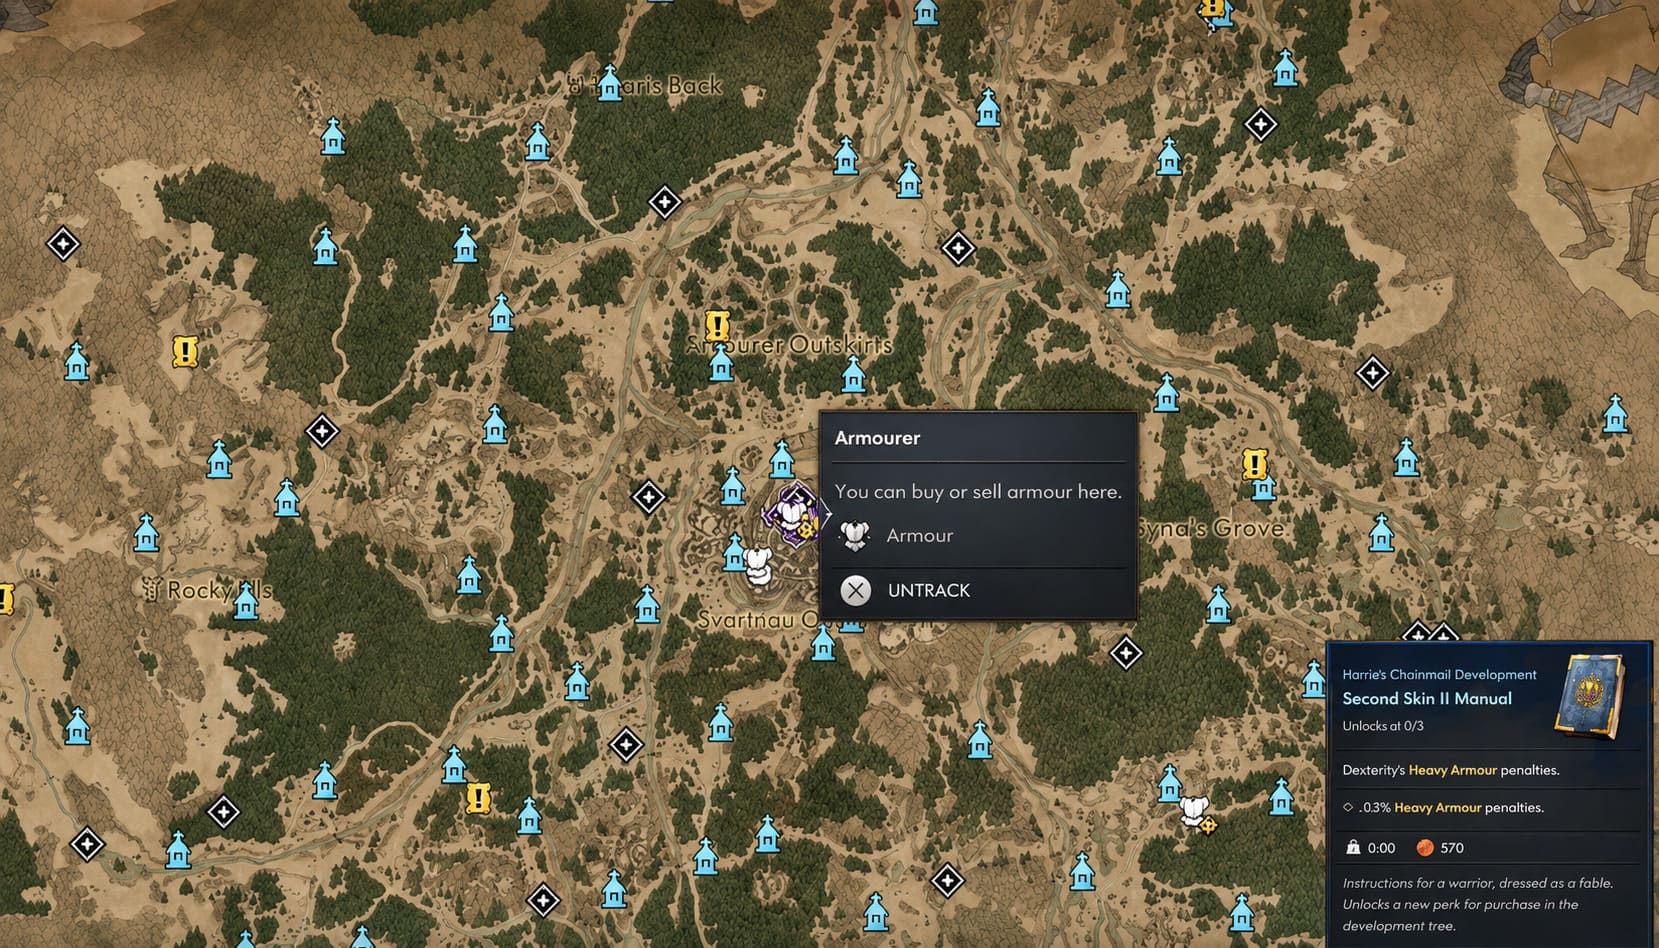
This one is probably the easiest Armourer to walk past if you’re not paying attention.
Svartrau contains another Armourer, but he isn’t standing around in an obvious outdoor stall. You need to head toward the central marketplace and find the prominent house positioned around the market area.
Go inside and look for the staircase leading upstairs.
The Armourer is located on the upper floor.
This is exactly the sort of location that can cause unnecessary wandering. If you’re staring at the ground-level map and expecting to find a vendor standing in the open, you’ll probably end up circling the marketplace wondering what you missed.
And yes, this Armourer also follows the daytime schedule.
Skill Manuals Available
This vendor sells:
- Second Skin I
- Second Skin II
That’s actually a pretty useful catch-up option.
If you rushed through the early portions of the game and completely ignored the Maragir Armourer, you don’t necessarily have to panic. This Svartrau vendor gives you access to both levels, allowing you to pick up the earlier and later Second Skin manuals from the same location.
Just make sure you visit during the day.
For players who tend to focus heavily on the main storyline and skip side exploration, this Armourer can be especially valuable.
Armourer #4 — Tantari
Location: Tantari
Availability: Daytime Only
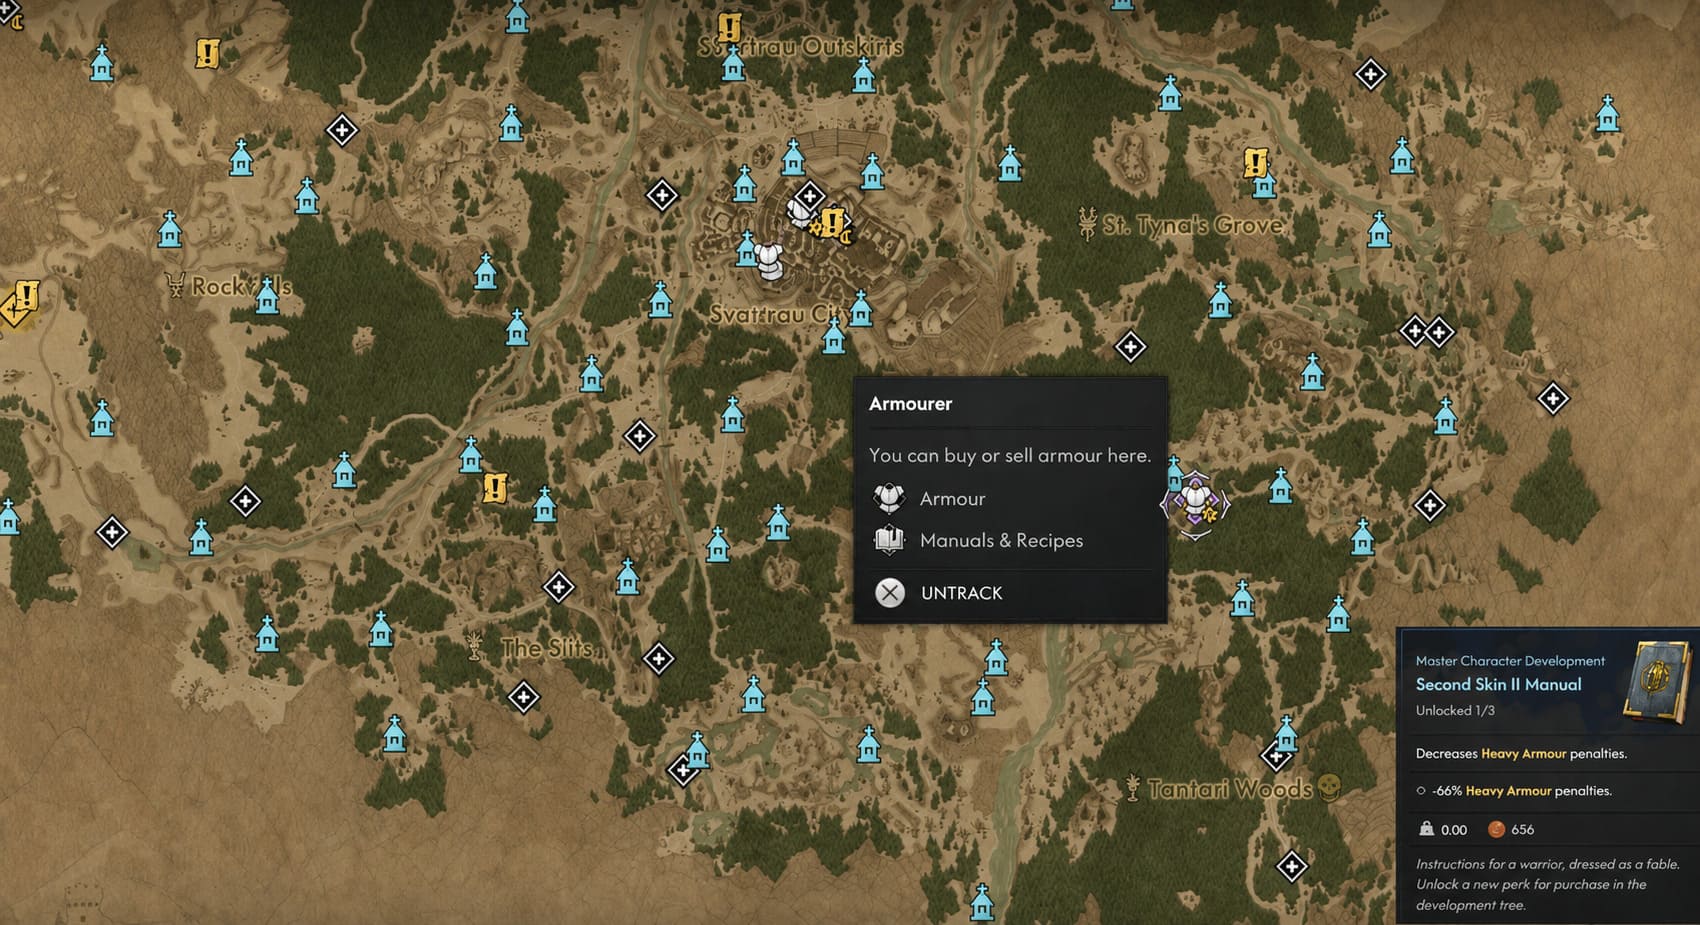
The final Armourer is found in Tantari, and this is where the vendor inventory becomes particularly interesting for defensive builds.
Like the Armourer in Maragir and the marketplace Armourer in Svartrau, this NPC is daytime only.
Tantari can already be an inconvenient destination depending on where you are in your playthrough, so arriving at night and discovering that your target vendor isn’t available is exactly the sort of wasted journey that gets old fast.
Check the time before making the trip.
Skill Manuals Available in Tantari
The Tantari Armourer sells:
- Second Skin II
- Walking Fortress
The second one is the real prize.
Walking Fortress is aimed at players who want to lean heavily into defense, heavy armor and stability. If your preferred approach is to stand your ground instead of dancing around every attack, this manual becomes extremely attractive.
It improves your ability to withstand stagger and helps create a much more resilient character. Against hard-hitting enemies and bosses, that can be a huge advantage.
It isn’t the kind of purchase I’d make casually in the early game, especially if your Denarii reserves are struggling. But once you’re approaching the tougher sections of the game and your build is starting to take shape, Walking Fortress is absolutely worth considering.
For a tank-oriented character, this can be one of the more meaningful investments available from the Armourer system.
How I Would Spend Denarii
This is where I think a lot of players can save themselves some frustration.
Don’t treat every armor upgrade as mandatory.
Your equipment is going to change. You’ll find better armor through exploration, quests, dangerous locations and other activities. Dumping huge amounts of Denarii into an early piece of equipment only to replace it later feels terrible.
Permanent Skill Manuals are different.
I’d generally approach the Armourer economy like this:
- Buy important permanent Skill Manuals first.
- Upgrade armor that you know you’re going to keep.
- Avoid heavily investing in temporary early-game equipment.
- Save enough Denarii for expensive late-game manuals.
- Upgrade your final or preferred armor set aggressively once your build is established.
The Pack Mule Manual is particularly useful for exploration-heavy players, while the Second Skin progression is a much more universal defensive investment.
If you’re building around heavy armor, save toward Walking Fortress.
Make the Day-Night Cycle Work for You
The biggest practical mistake you can make with Armourers is ignoring the clock.
Three of the four vendors are restricted to daytime. That means fast traveling to a location without checking the time can turn a five-minute vendor visit into a frustrating detour.
My advice is simple: plan your Armourer visits around daytime rather than treating them as random shopping trips.
If you’re already near a campfire or tavern, advance the time before traveling. It takes far less time than reaching your destination, finding an empty workshop and then having to figure out how to wait until morning.
The Svartrau southwest Armourer is the exception, and that’s one reason I like keeping his location in mind. When you need an armor upgrade at an awkward hour, he’s the reliable option.
How to Farm More Denarii for Armor and Manuals
Eventually, you’ll hit that familiar RPG problem: you’ve found the item you want, you’ve found the vendor you need, and you’re completely broke.
Fortunately, The Blood of Dawnwalker gives you plenty of ways to rebuild your wallet.
Keep an eye out for nearby activities such as:
- Bandit Camps
- Persons in Danger
- Curious Houses
- Side Quests
- Valuable loot that can be sold to vendors
Don’t underestimate the value of simply exploring.
Clearing nearby points of interest while you’re already in the area is usually much more efficient than making a dedicated trip solely to grind currency. You’ll earn Denarii, collect useful items, complete objectives and potentially discover better equipment at the same time.
That’s the sort of RPG efficiency I always prefer: make one trip and get four things done.
The Blood of Dawnwalker Blacksmith Locations & Gear Upgrade Guide
Which Armourers Should You Visit First?
For most players, I’d recommend making the Armourers part of your normal progression rather than waiting until you’re desperate for an upgrade.
Start with Maragir to grab Pack Mule and Second Skin I. Then, once you’re working through Svartrau, visit the southwest Armourer for Second Skin II.
While you’re in Svartrau during the daytime, check the marketplace house as well. The second vendor can fill in the gaps if you missed the earlier manuals.
Later, make your way to Tantari and check out Walking Fortress if it fits your build.
The nice thing about this route is that you’re not just improving your armor. You’re gradually building a stronger character underneath that armor.
The Blood of Dawnwalker: All 9 General Store Locations & Merchant Guide
Final Thoughts
The Armourer system in The Blood of Dawnwalker is easy to underestimate. At first glance, these NPCs might look like simple gear vendors, but their Skill Manuals make them much more important than your average shopkeeper.
There are only four Armourers, and knowing their locations saves a surprising amount of running around. The real headache is their schedule: three are daytime-only, so always keep the day-night cycle in mind when planning a shopping trip.
Maragir gives you the excellent Pack Mule and Second Skin I manuals. The southwest Svartrau Armourer provides Second Skin II and stays open around the clock. The marketplace Armourer in Svartrau offers both Second Skin tiers as a convenient catch-up option. Finally, the Tantari vendor brings the defensive-focused Walking Fortress manual into the picture.
If you’re trying to build an optimized character, don’t just throw Denarii at every armor level you can afford. Think about what will still matter ten hours from now.
Permanent Skill Manuals are long-term investments. Armor pieces are not.
Get Pack Mule early if you loot everything in sight, build through the Second Skin progression as your defensive foundation, and save for Walking Fortress if you’re committed to a heavy defensive build. Once you understand how the vendors, currency and day-night cycle fit together, the Armourer system becomes much easier to manage—and you’ll spend far less time making pointless trips across the map.